Back to builds

Build Log

HMAV Bounty

completed Scale: 1:60 Amati View gallery →

This model represents HMS Bounty as a compact 18th‑century three‑masted armed transport, with detailed rigging and deck fittings capturing the ship’s appearance at the time of the famous mutiny

HMAV Bounty

Historical Background

HMAV Bounty was a small three‑masted armed transport of the Royal Navy, originally the merchant collier Bethia, purchased and refitted in 1787 for a botanical mission to carry breadfruit from Tahiti to the Caribbean.

Built in 1784 as a civilian collier, Bethia was acquired by the Admiralty and converted into His Majesty’s Armed Vessel Bounty, given a compact but efficient rig and light armament suitable for long‑range voyages rather than line‑of‑battle actions. Under the command of Lieutenant William Bligh, she sailed to Tahiti to collect breadfruit trees intended as a cheap food source for enslaved workers on plantations in the British West Indies, reflecting the scientific curiosity and colonial ambitions of late 18th‑century Britain.

On the return voyage in April 1789, part of the crew led by master’s mate Fletcher Christian seized the ship in a now‑famous mutiny, setting Bligh and 18 loyal men adrift in an open boat, from which Bligh navigated an extraordinary passage to safety. The mutineers eventually made their way to remote Pitcairn Island, where they burned Bounty in what is now Bounty Bay and founded a small, isolated settlement, ensuring the ship’s story a lasting place in naval history and popular culture.

Build Log

Part 1

07.04.2024

The hull

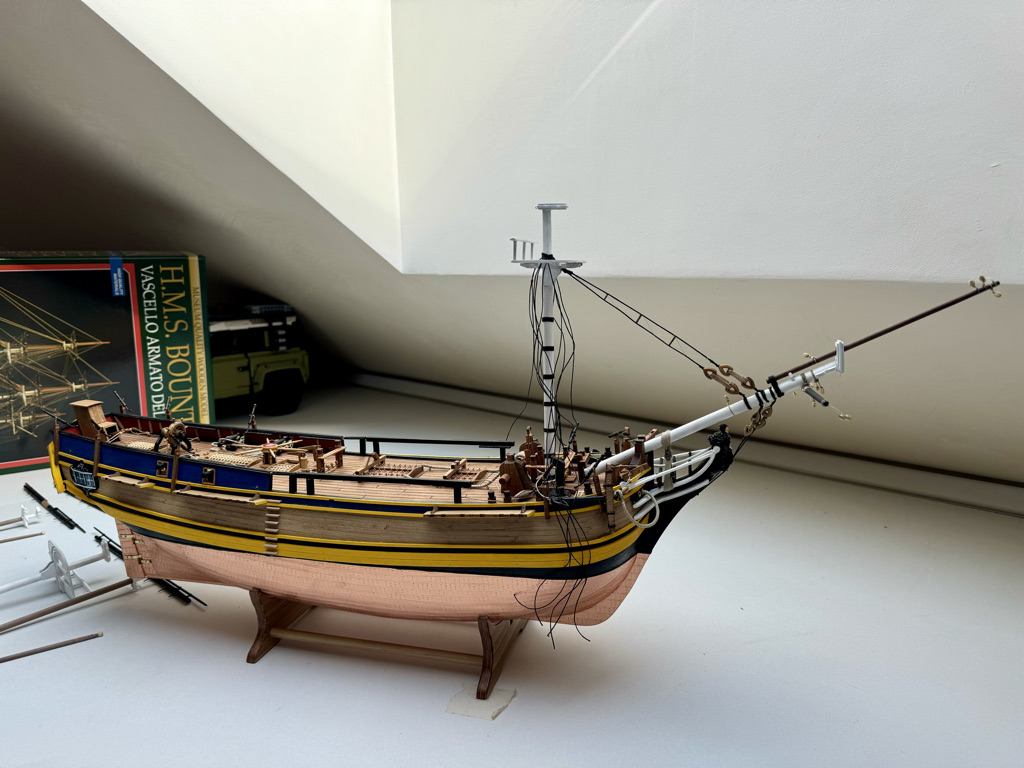
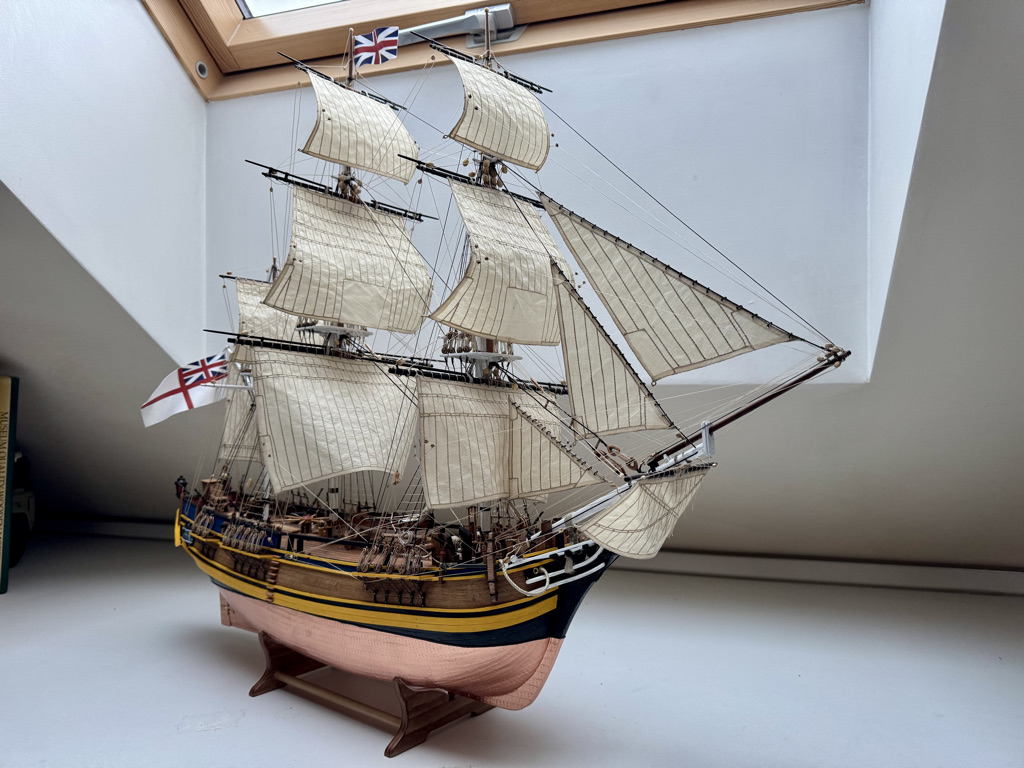
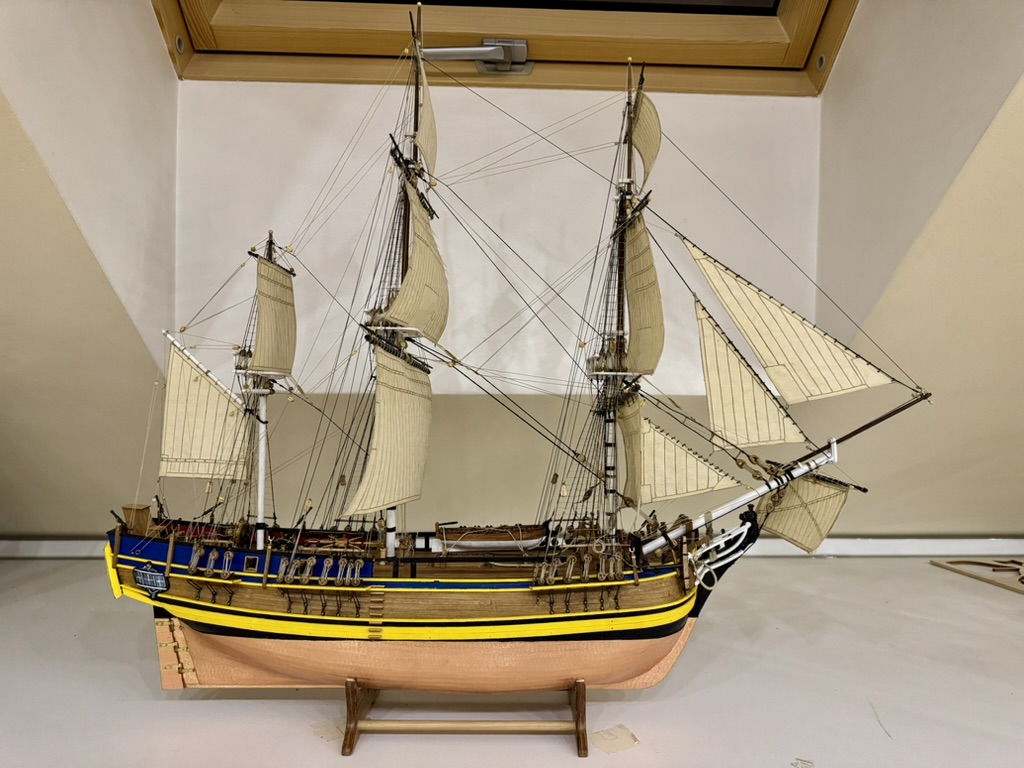
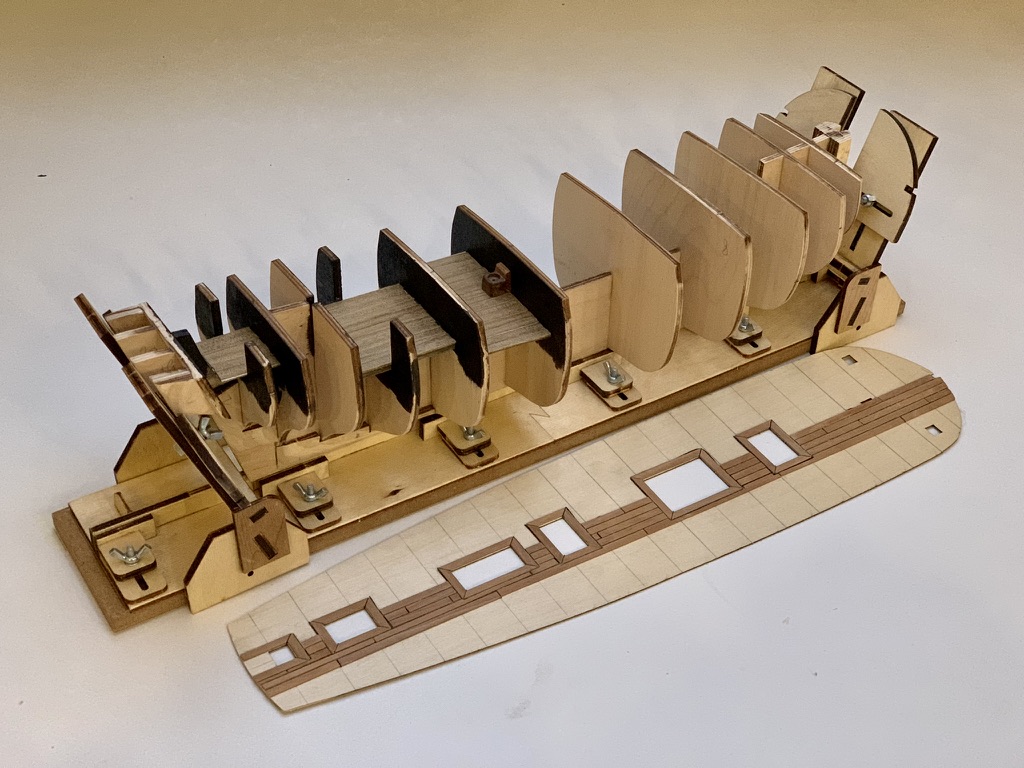
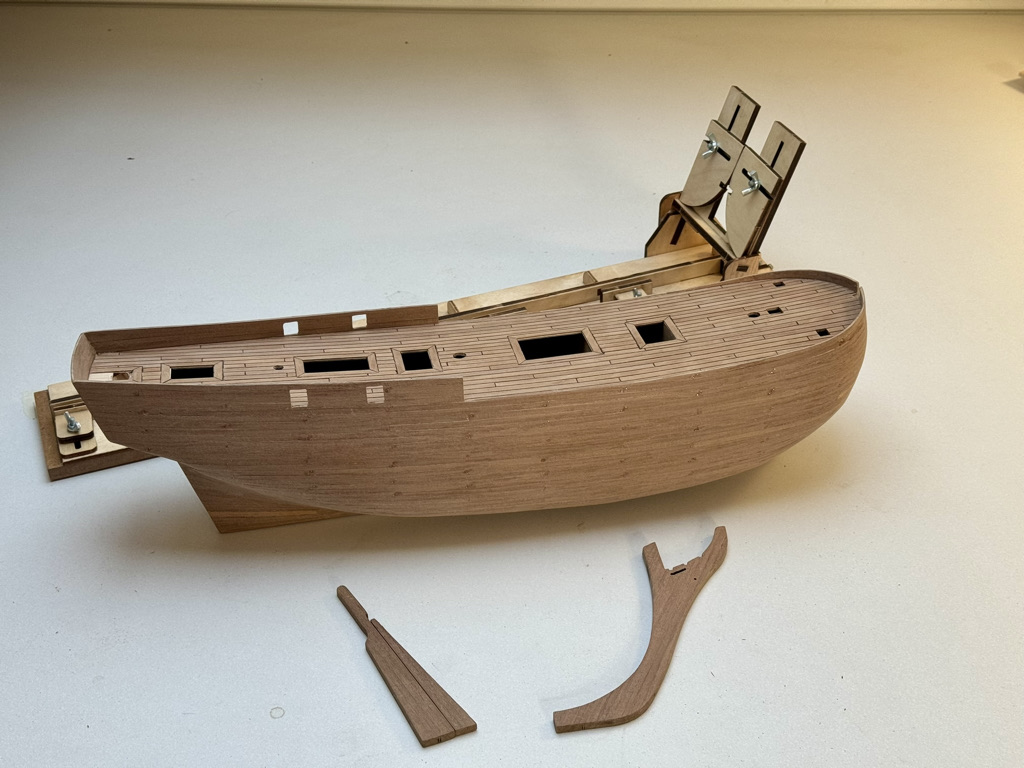
Building the hull of the Bounty model became the first and one of the most important stages of work on this ship. The construction is classic: a plywood keel frame and bulkheads define the shape, while the keel and stem posts are made from solid walnut. The planking is double-layered — first the hull is planked with 1.5 mm limewood strips, followed by an outer layer of 0.5 mm walnut, which gives the model a rich tone and realistic wood texture.

Bounty hull WIP

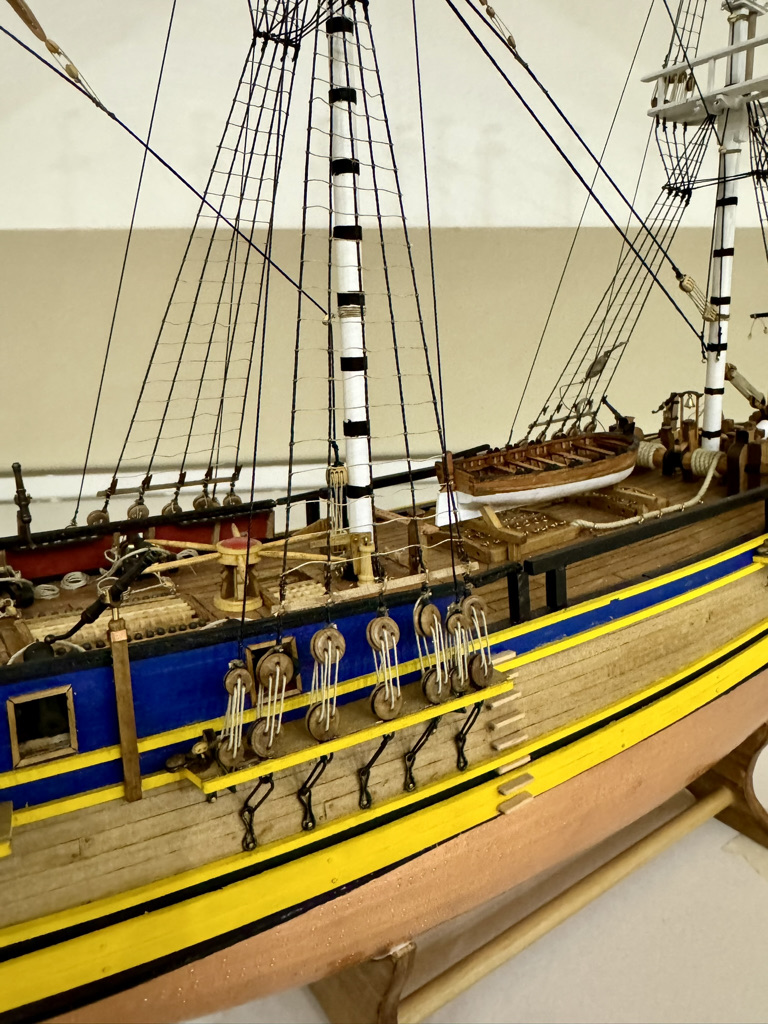
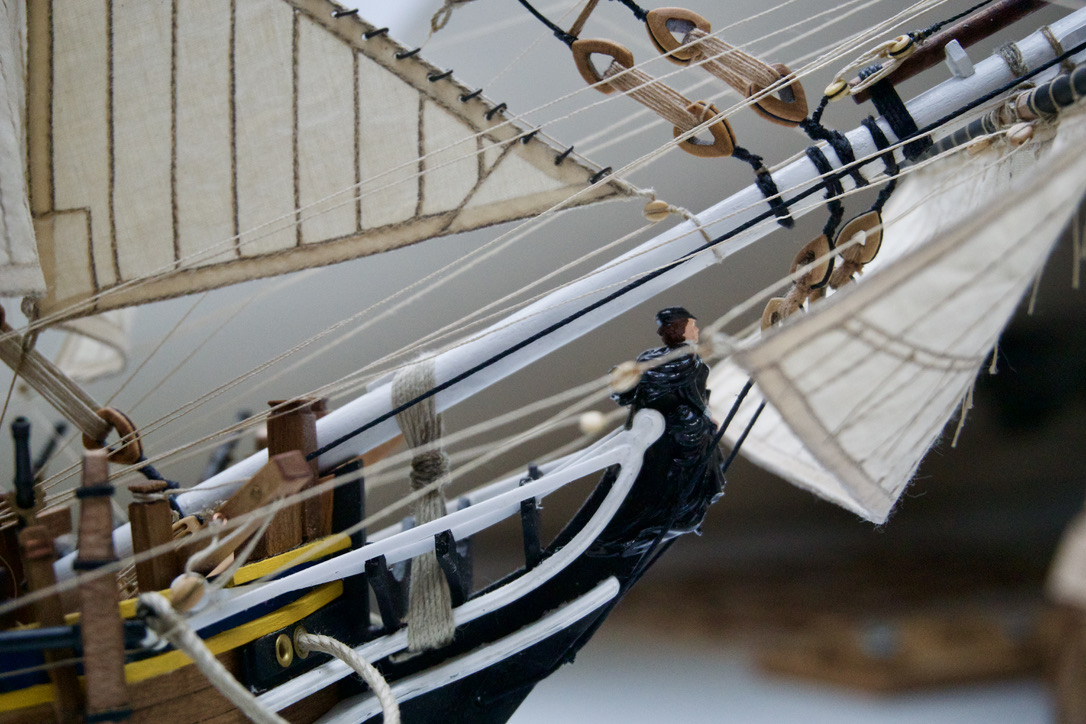
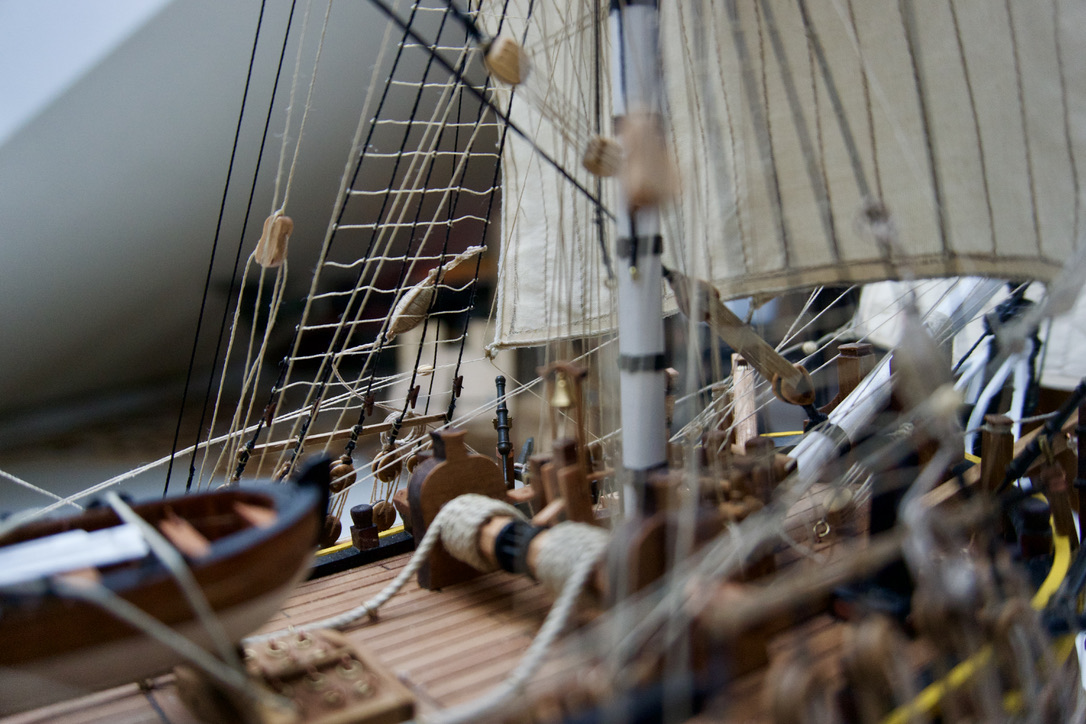
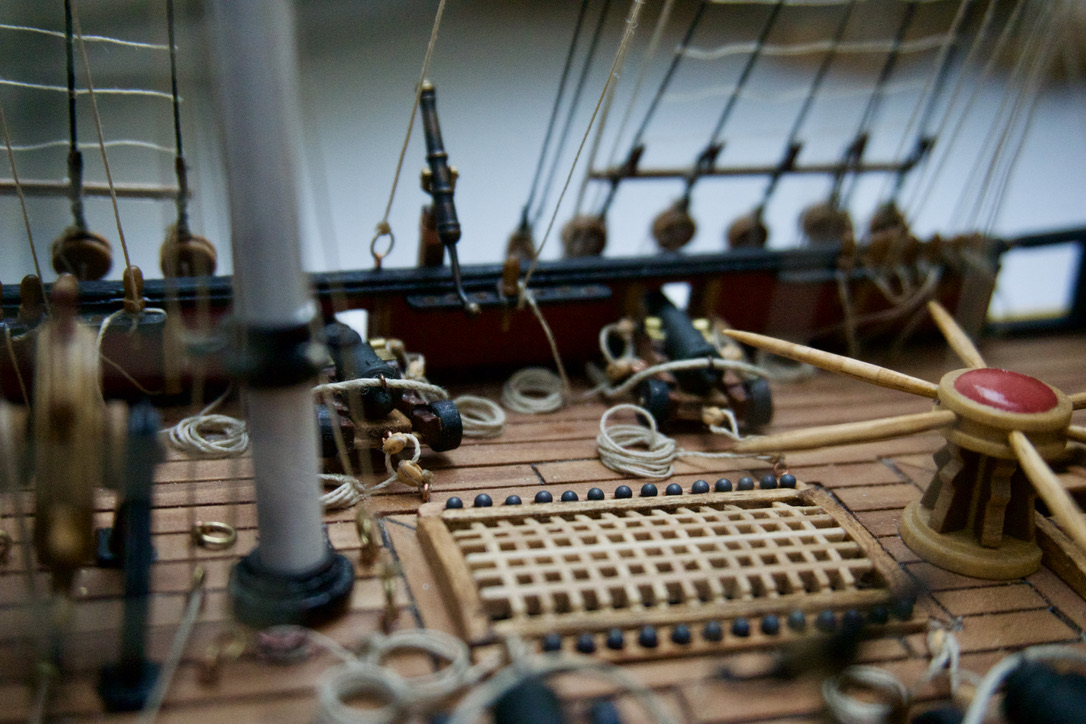
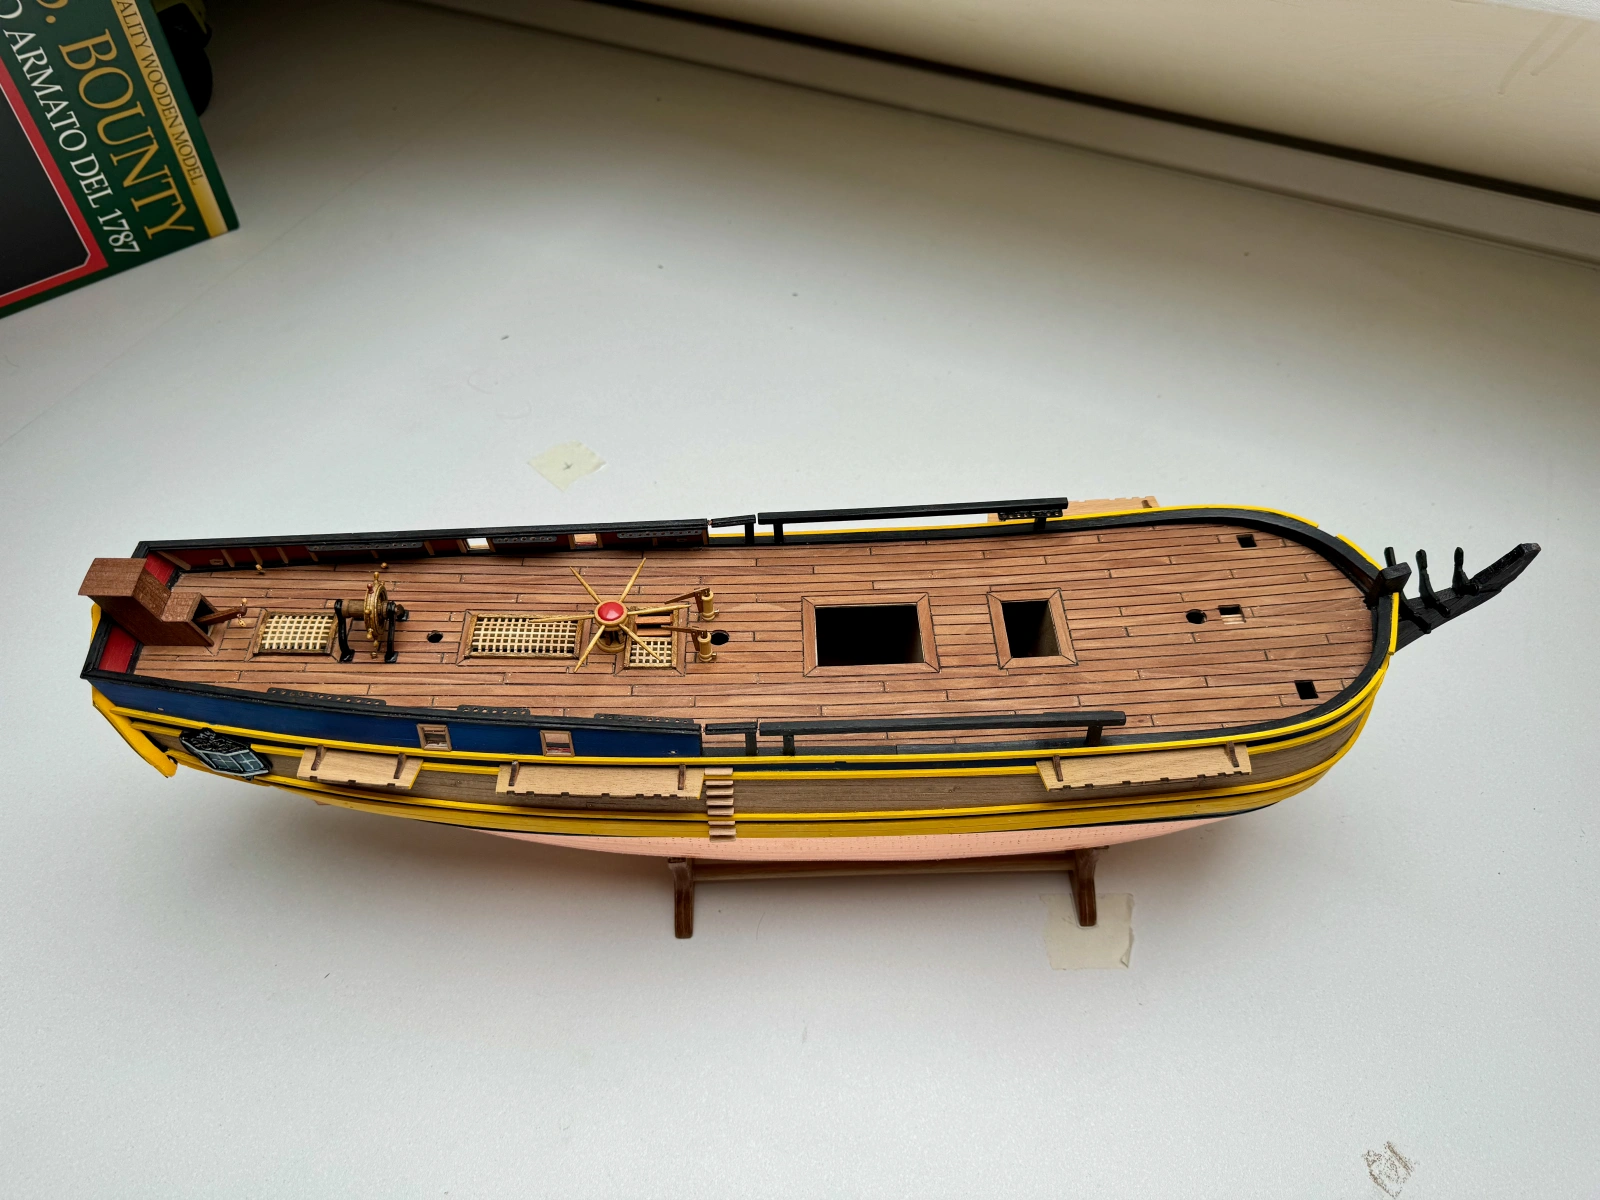
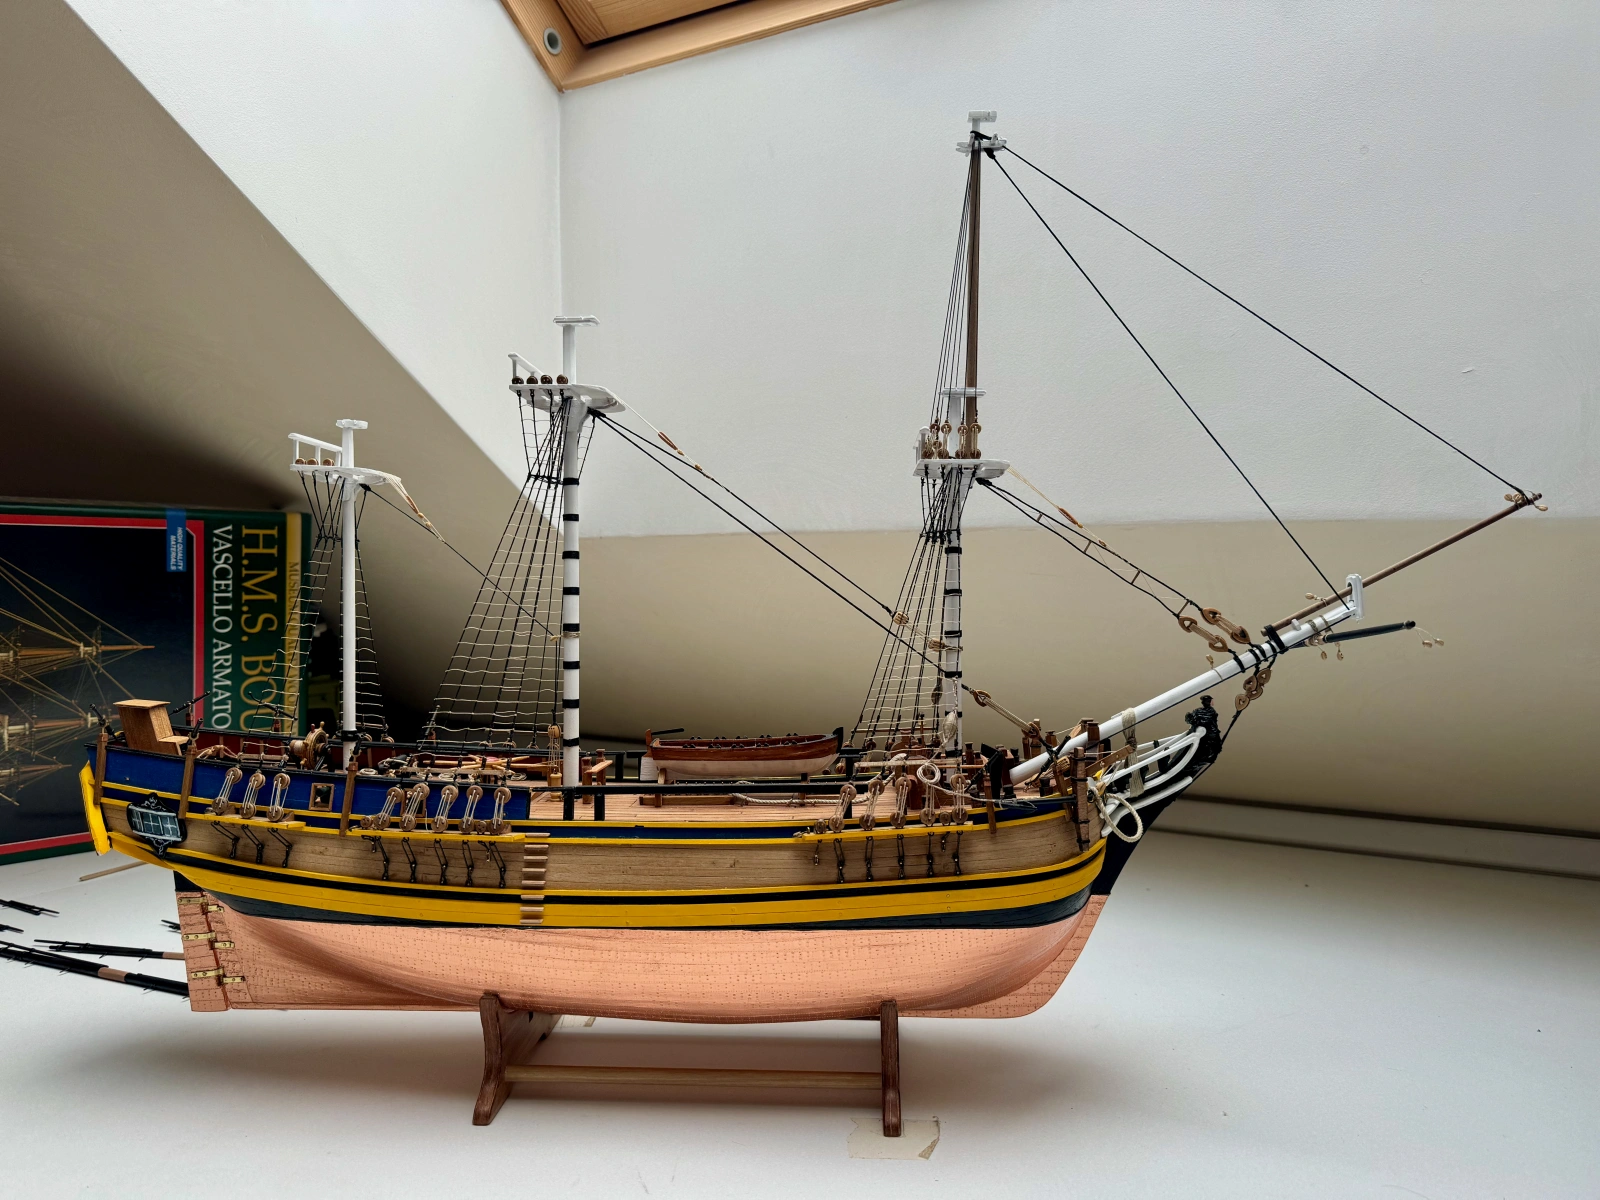
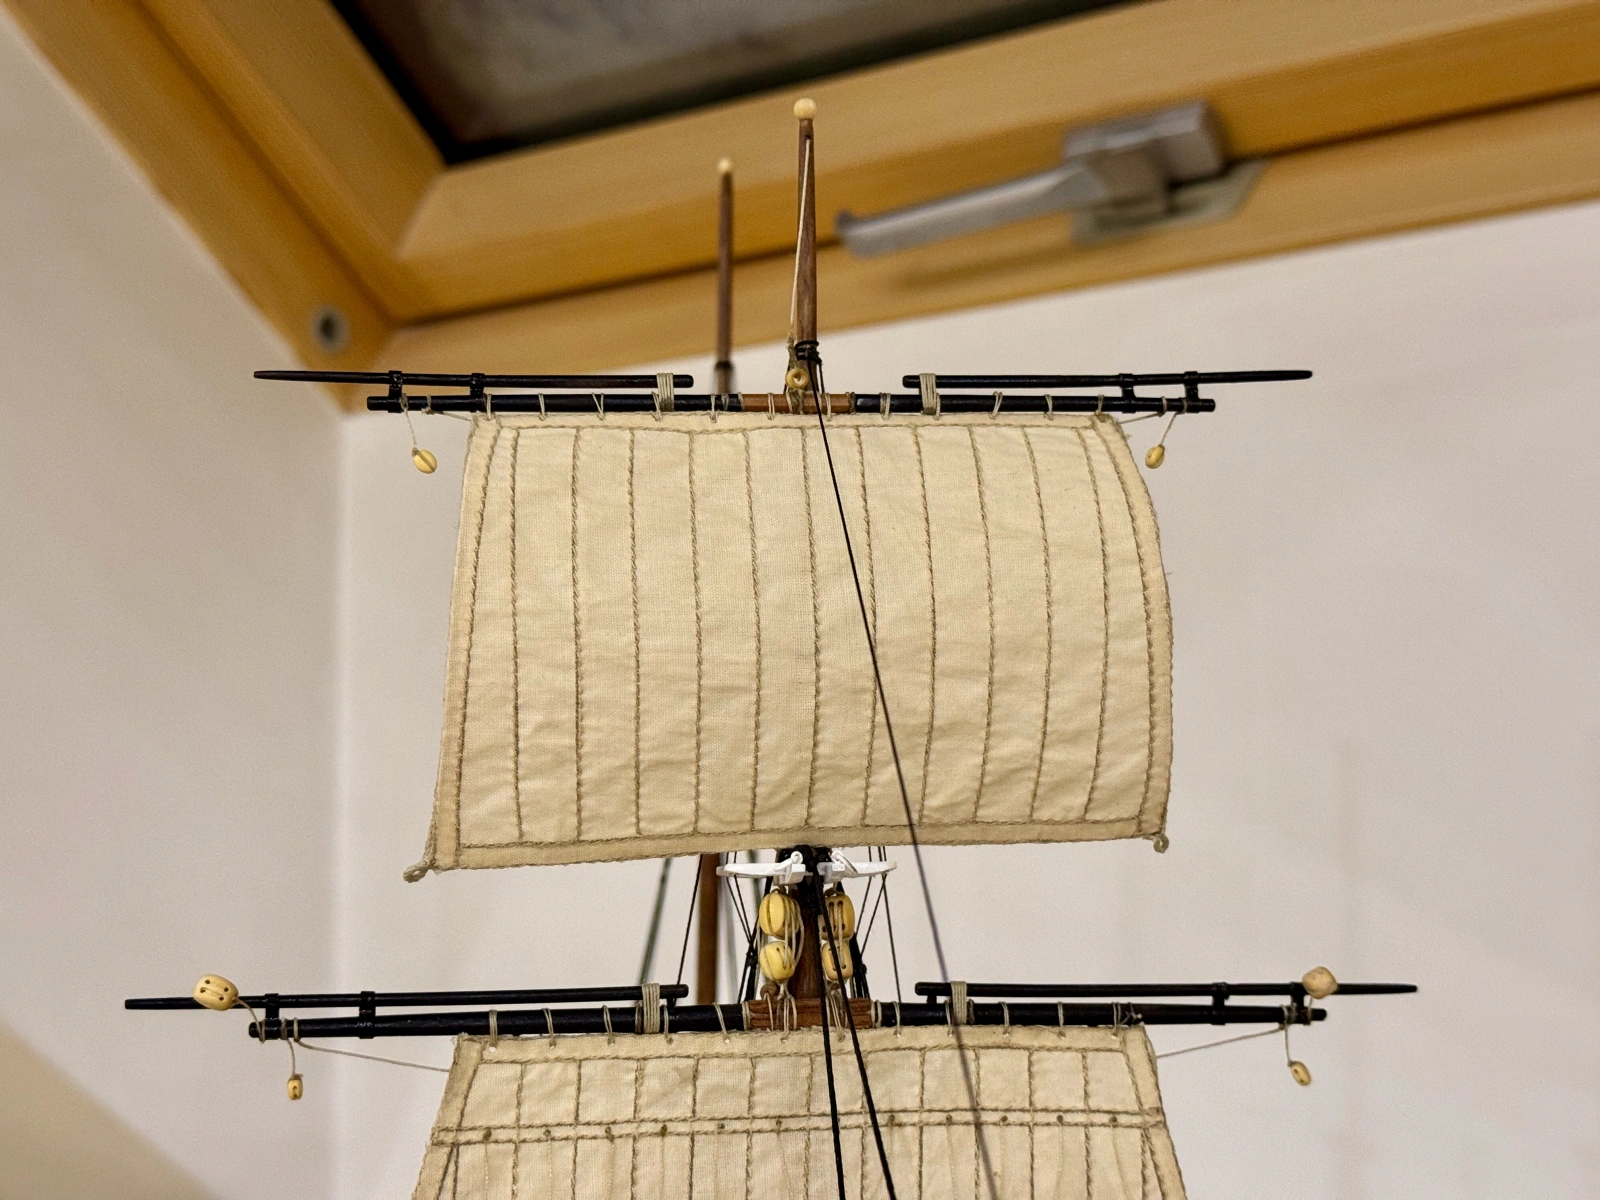
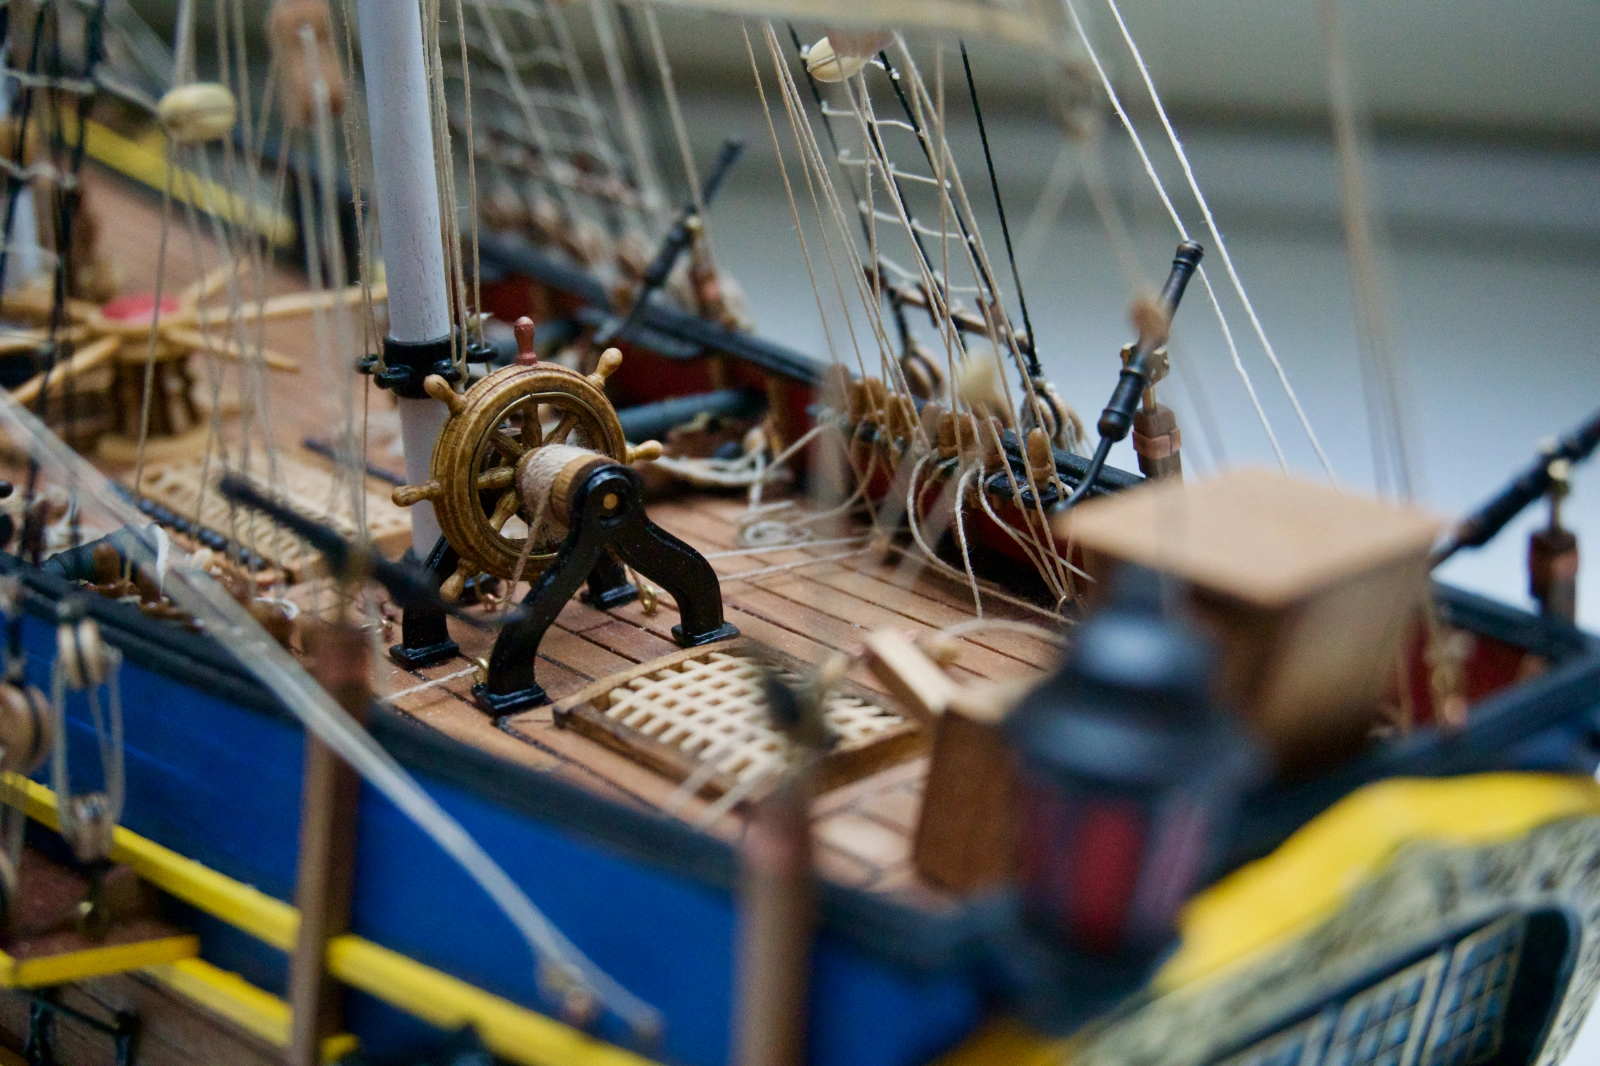
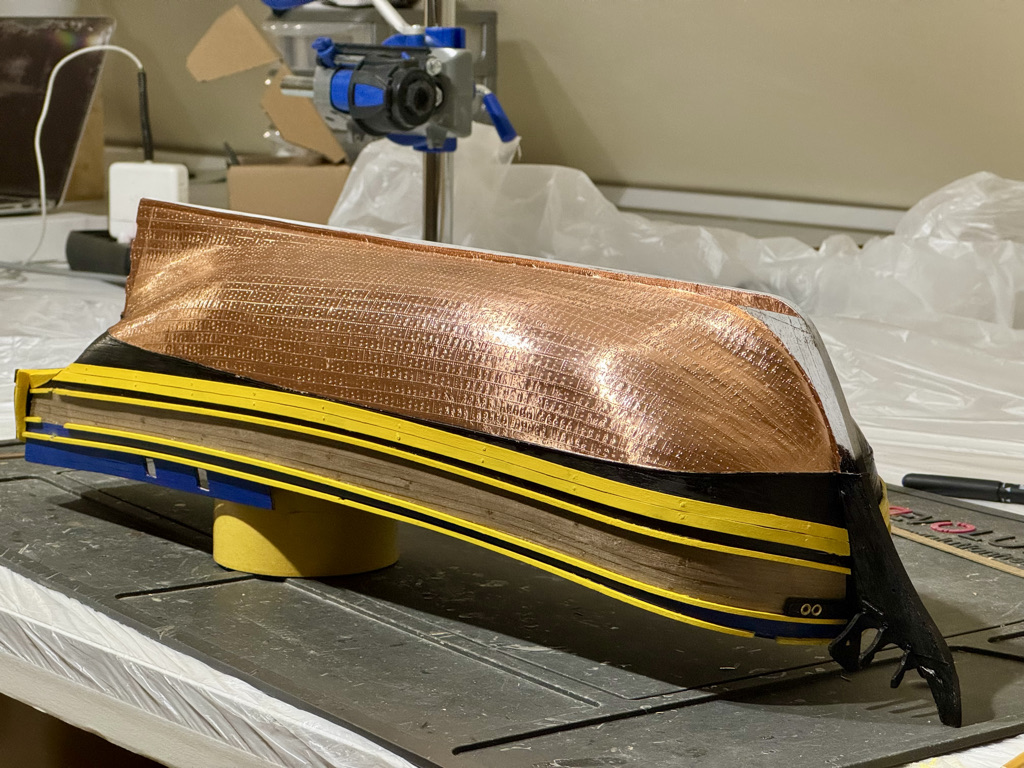
Compared to the original kit, many modifications have been made. Balsa inserts were added to the bow and stern for smoother lines, and additional lower decks were installed beneath the hatches. The main deck is planked with 1 mm pearwood strips, carefully replicating the caulking seams and nail marks — this gives the surface an almost life‑like appearance. The sheer strakes were made according to 18th‑century drawings of the original ship. Above the waterline, nail heads and fastenings are partially imitated, while below the waterline, the hull is sheathed with miniature copper plates, just like on the real Bounty. This not only enhances the look of the model but also adds historical authenticity.

Bounty hull planked

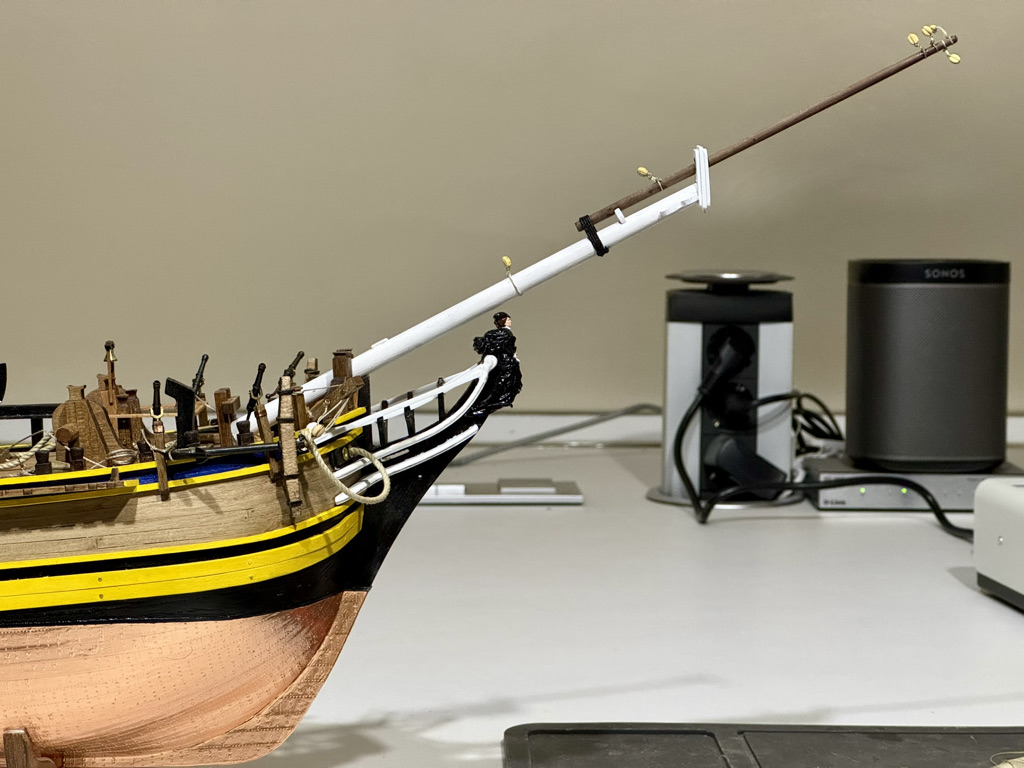
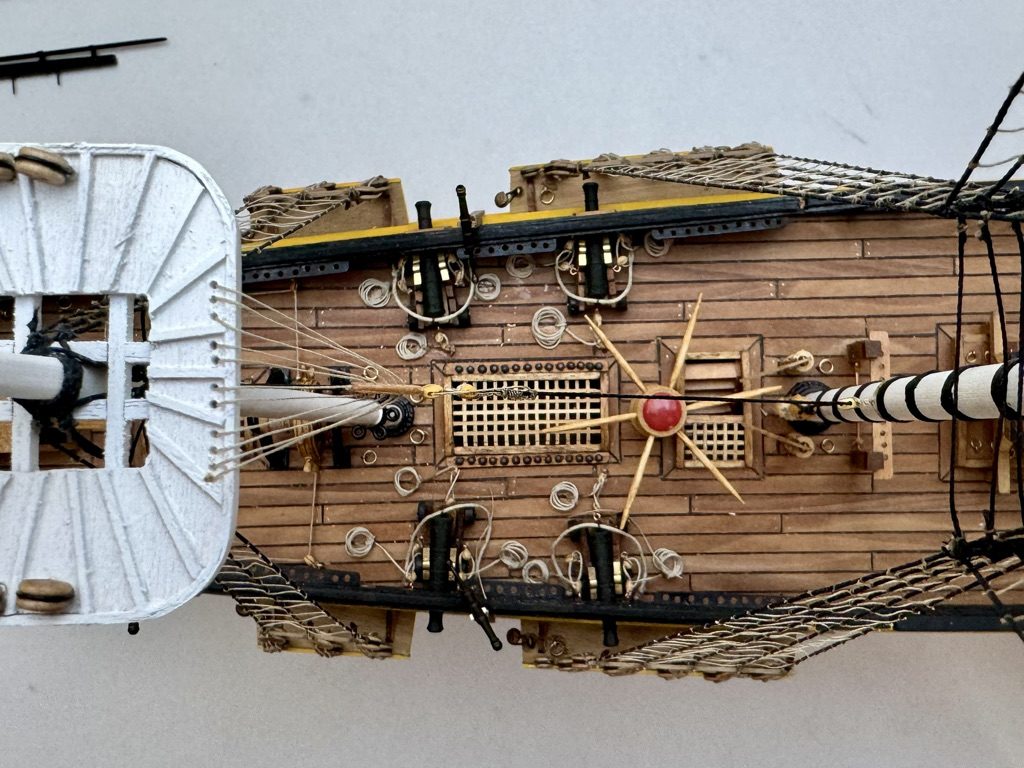
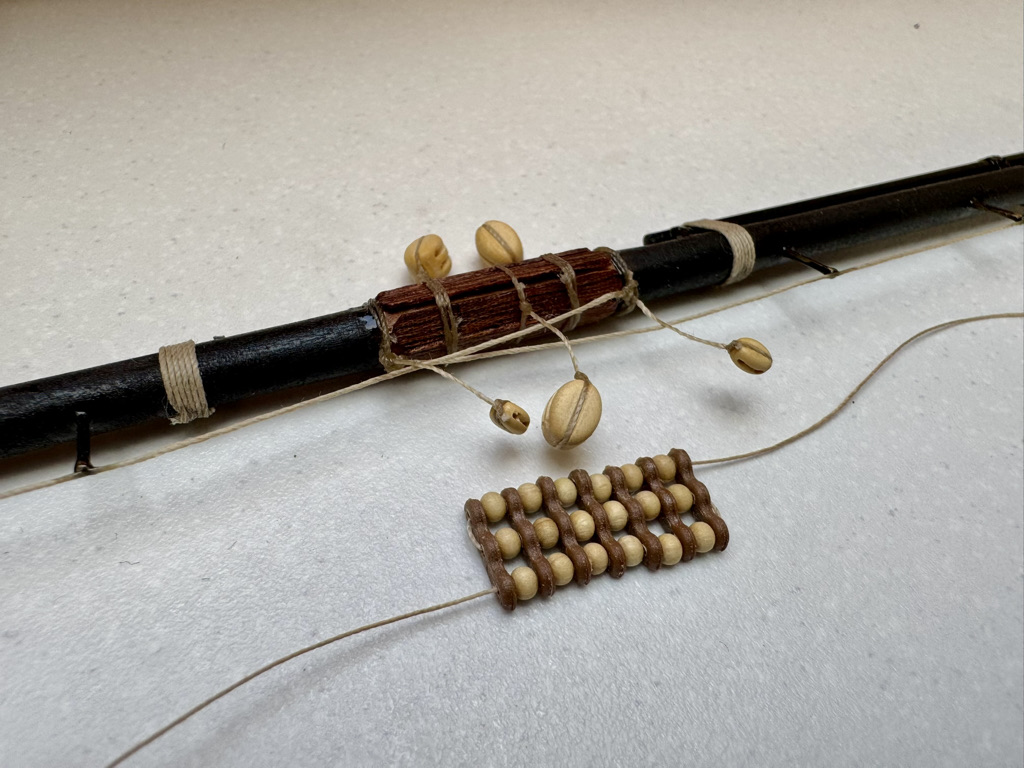
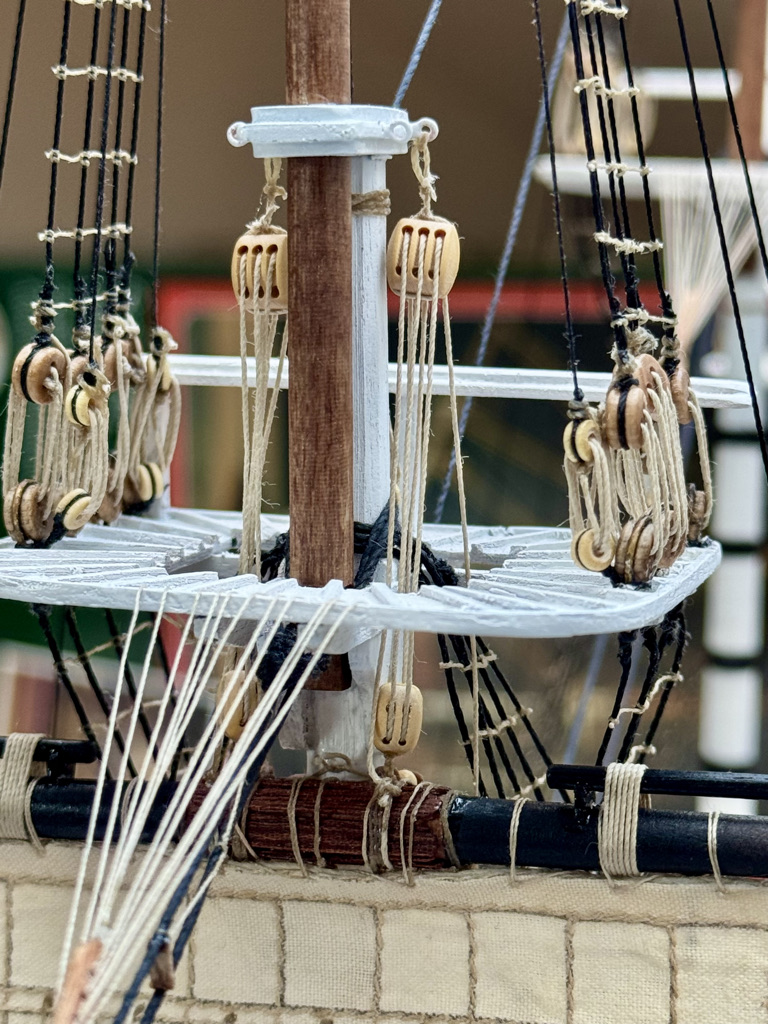
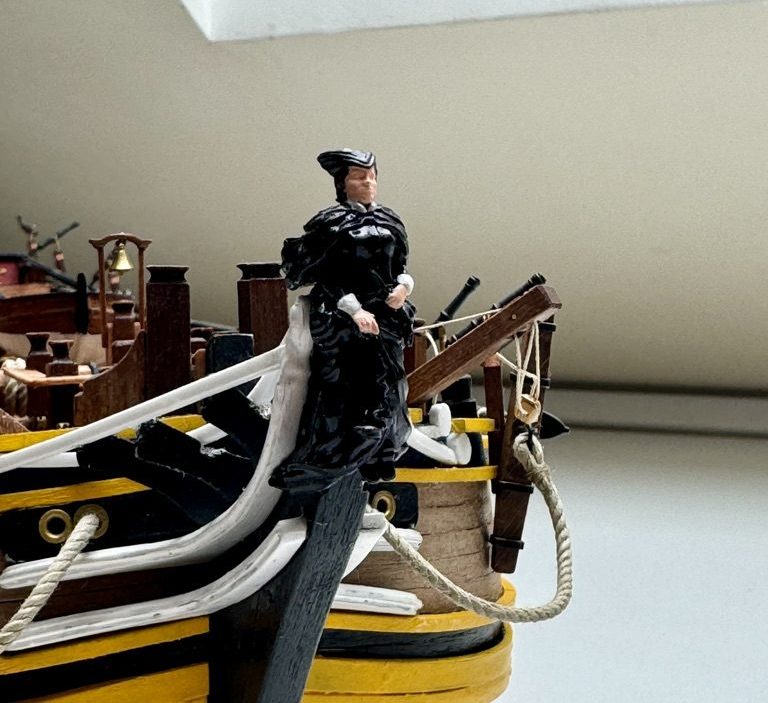
Alongside the hull, several auxiliary elements were extensively reworked. The windlass was completely rebuilt; the cannons were replaced with more historically accurate ones, together with improved gunport framing. The figurehead was also changed to a more faithful replica based on archival references. Special mention goes to the ship’s launch — built entirely from scratch with a framed hull, bent ribs, planking, and deck planks — faithfully reproducing full‑scale shipbuilding methods in miniature.

Bounty hull copperingBounty head figure

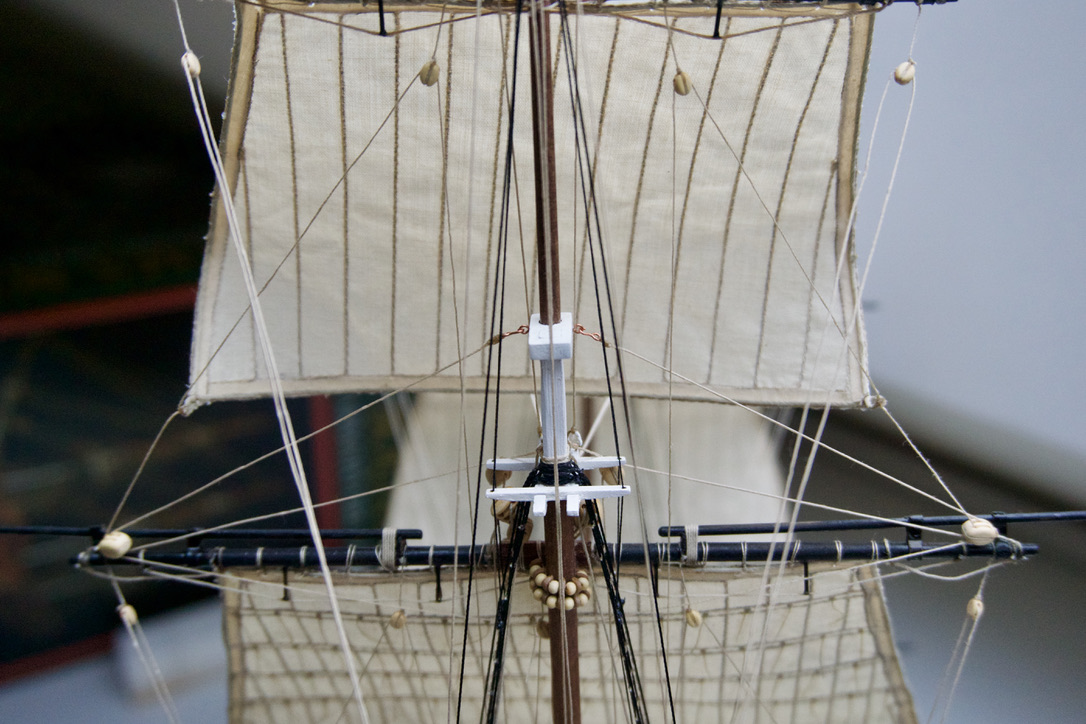
There are many more small refinements and improvements, too numerous to list in detail. Yet it is precisely these subtle details that give the model its sense of life, turning the Bounty from a standard kit into a truly original, handcrafted work with its own character and spirit.

↑ Back to all parts

Part 2

29.09.2024

Spars and standing rigging

Work on the Bounty’s masts and standing rigging followed the same sequence as on the real ship: from the bowsprit to the mizzen, from the deck to the mastheads. The bowsprit on the model is built up, just like on the prototype: the bowsprit itself and the jibboom, joined by a cap, carrying the forestays of the foremast as well as the rigging for jibs and staysails. All lower masts have been installed and fitted with tops, crosstrees, and caps for the topmasts; after that, the shrouds, stays, backstays, and other elements of the standing rigging were added step by step. In parallel, the “dressing” of the spars was carried out: blocks for the future running rigging were installed on masts and yards, and the connections that would be formed by wooldings on the real ship were carefully imitated with rope of the appropriate diameter.

Bounty bowsprit

Once the lower masts were in place, work began on the topmasts and topgallant masts. In total, the model has five topmasts: one for each mast plus two topgallant masts on the fore and main; the mizzen has no topgallant and consists of two spar elements. In terms of how they are secured, the topmasts follow the same principle as the lower masts: the heel sits in a cap on the head of the mast below, while several pairs of topmast shrouds, set up through smaller deadeyes, provide lateral support. In addition, the topmasts are held by backstays, which take most of the load, with the topmast shrouds acting as supplementary support. For the fore and main topgallant masts, separate shrouds are led through holes in the crosstrees and set up to the topmast deadeyes, and their stays are taken through blocks on the bowsprit or foremast and secured with eye splices in accordance with the prototype.

Bounty foremast

The standing rigging comprises all the lines that do not work dynamically under sail — shrouds, stays, backstays, and related elements — and provides both longitudinal and transverse stiffness for the spars. On the model, the shrouds are installed in pairs, alternating to port and starboard; if their number is odd, the aftermost “pair” is made up of two single shrouds. The lower deadeyes are pre-mounted in metal chainplates, which are set into the channels and connect the rigging to the hull. Each shroud is passed around its deadeye and secured with reliable seizings, then set up with lanyards in pairs, equalizing the tension and keeping the masts plumb. After this, the ratlines are tied in — a separate, labour‑intensive stage that creates the “ladders” between the shrouds and has a strong impact on the visual appearance of the standing rigging.

Bounty shrouds

The colour scheme of the spars follows a pattern commonly used on eighteenth‑century sailing vessels. The lower masts and elements of the crosstrees are painted in a light colour, the yards predominantly in a dark one, with a few exceptions, while the topmasts are left unpainted to show the wood grain. Particular attention is paid to the form and section of the yards: on the main and fore lower yards, the transition from a round to an octagonal section in the middle part is reproduced, with battens fitted according to historical descriptions, and fittings for studdingsail booms are provided for the additional sails. As a result, the spars and standing rigging of the model not only meet the structural requirements for supporting the masts and yards under sail load, but also closely reproduce the documented configuration of the Bounty at the end of the eighteenth century.

↑ Back to all parts

Part 3

21.11.2024

Sails and running rigging

For convenience, the yard rigging and installation of the sails on them had to be combined, so that the complete “yard + sail” assembly could then be mounted on the model. Before fastening the sails, it was necessary to install the required blocks and reeve the footropes – the lines along which the sailors moved when working the sails. The main yards were secured with tackles, whose running ends passed through a pair of blocks and were usually led down to a belaying pin rail at the foot of the corresponding mast. At the mast, the yard was supported by a parrel, acting as a kind of bearing, allowing the yard to be braced, that is, rotated around the mast axis by means of the braces.

Bounty main yardYard mounting

Next came the running rigging. Topping lifts keep the yards perpendicular to the masts (or to the bowsprit for the spritsail yard), ensuring their position while working the sails. The braces serve to turn the yards in the horizontal plane, while sheets, clewlines, buntlines and leechlines are responsible for setting, furling and trimming the sail cloth.

Bounty sails

Work on the sails themselves went on in parallel. I had two pieces of fabric of almost suitable thickness with a printed panel layout, whose lines made cutting and sewing easier, but at the same time reduced the level of scale fidelity, and attempts to lighten them were unsuccessful. Full historical accuracy had to be abandoned: instead of double seams only single ones were made, with bolt-rope and reef points added as extra details, and the “weathering” of the fabric carried out with ordinary tea to bring the colour closer to real sailcloth. After that, holes were drilled in the head (top) leech of each sail for robands or lacings, depending on the sail’s function.

Yard and sail

At the final stage, the sails were secured to the already rigged yards and the masts prepared for final assembly. Square sails were fastened to the yards with robands – short lengths of line passed through the eyelets along the head of the sail and tied around the yard. Of the fore‑and‑aft sails, in addition to the spanker, Bounty carried staysails and jibs on the stays, attached to them with lacings; on the model these are made of metal, as wooden ones look too crude in this scale. After the running rigging and sails were installed, the topgallant backstays could finally be fitted: formally they belong to the standing rigging, but during the sail work they would have been in the way, so they were deliberately left “for later.”

↑ Back to all parts

Part 4

25.01.2025

Final touches

Seventeen months after the start of the project, the model is finally finished. What surprised me most is the proportion of time: pure woodworking took less than half of that period, while the rest was spent on masting, rigging, and sails. This was my first fully rigged sailing ship; previous builds were limited to a yacht and a boat with only partial rigging, so the complexity here turned out to be on a completely different level.

Bounty final view

Close-up photographs show where most of these months went: deadeyes, blocks, and lines forming a dense three-dimensional web around the masts and yards. The sails, with their panel seams, bolt ropes and reef points, also demanded far more time and attention than expected, from fabric preparation to final setting on the rig. Each new element added just a little visually, but required many carefully planned small operations.

Looking back, I can already see places where something could have been done more cleanly or more accurately, but this is normal for any long project. The important thing is that the model looks coherent as a whole, and I genuinely like the result. Now it is much easier to understand why experienced builders say that rigging is almost a separate discipline inside ship modeling – and why a finished fully rigged model feels like a small achievement on its own.

↑ Back to all parts

Project Specs

Model
HMAV Bounty
Scale
1:60
Manufacturer
Amati
Length
760 mm
Historical Year
1787
Total Parts
4
Status
completed