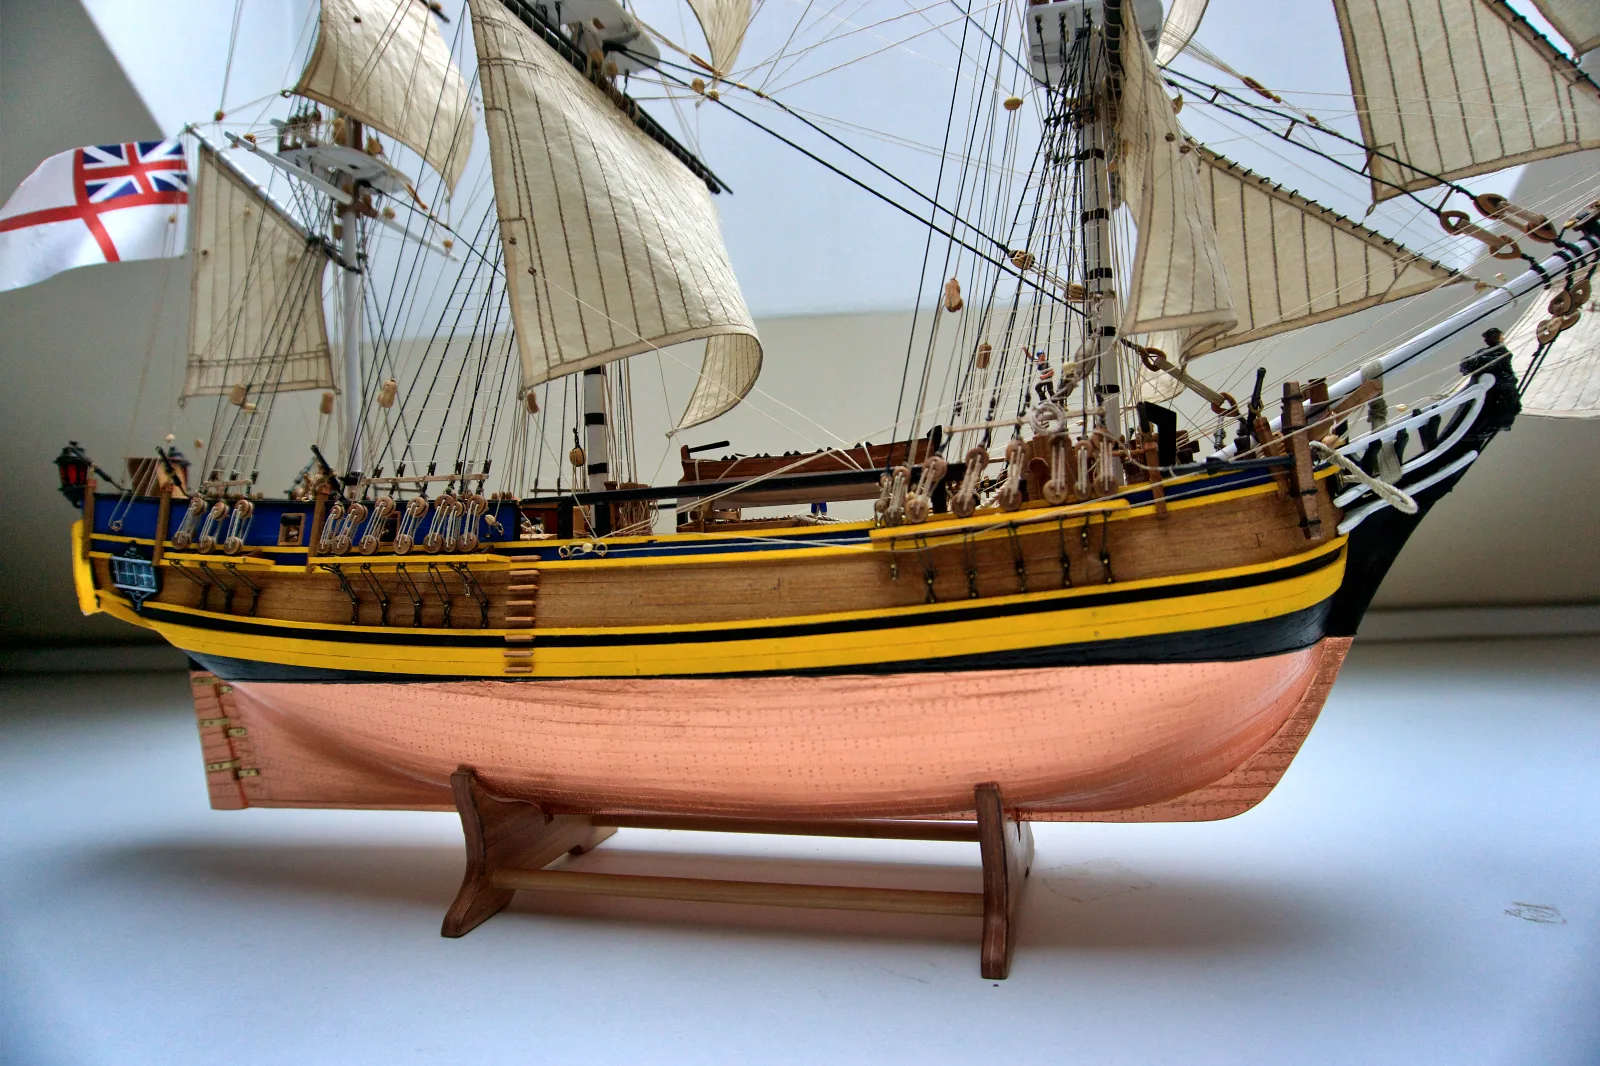
Standing Rigging
Standing rigging, as the name implies, comprises all the lines that remain fixed relative to the hull and provide the structural integrity of the entire rig. This is arguably the most painstaking work in the entire build — many repetitive operations, hundreds and thousands of knots, and many metres of thread. Let us walk through the key stages and potential challenges, and discuss techniques that will save both nerves and time.
The installation of standing rigging must be synchronised with the installation of the spars. It makes sense to rig each spar immediately after it has been stepped. As a general example, we will consider the standing rigging of a mast. The rigging of other spars — the bowsprit, for instance — is done in the same way.
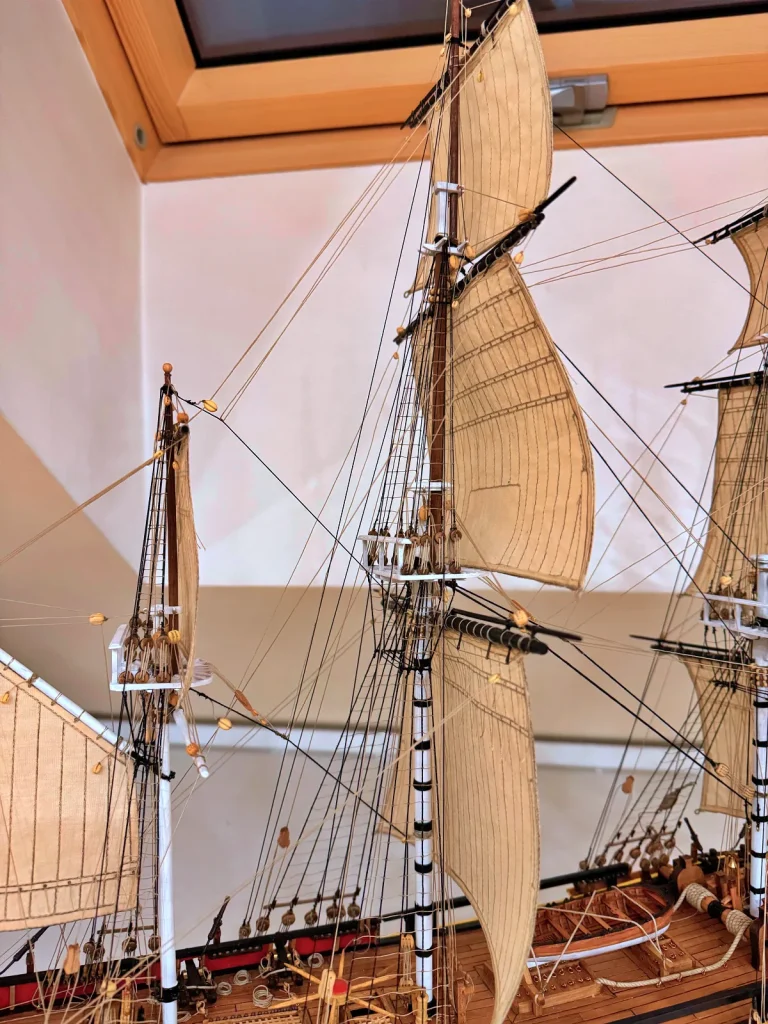
The standing rigging of a mast consists primarily of shrouds, which provide athwartship stiffness, and stays, backstays and futtock shrouds, which provide longitudinal stiffness. I usually fit the stays first, then the shrouds. I often postpone the backstays and futtock shrouds — especially those of the upper spars — until the very last stage, after the running rigging and sails have been installed. In what follows I will try not to dwell on rigging details specific to particular vessel types (these can be found in the build logs), describing only the operations common to most models.
First of all, make sure you have thread of the required diameter, texture and colour in sufficient quantity. At this stage it is worth consulting not only the kit instructions but also historical sources, as the threads supplied with a kit are not always chosen correctly. The final decision is yours. I prefer to use dark-coloured thread for standing rigging, since on real vessels rope was often tarred to protect it from salt water and wind. I favour waxed thread (or I treat it myself with beeswax) — such thread looks neat and does not fray. When calculating thickness, bear in mind not only the scale but also visual perception: mindless scaling can either produce an “invisible” rig or create a “forest of rope” that visually overloads the model. I will not give detailed recommendations here; that comes with experience.
So, the thread has been chosen — we can begin. When deciding on the sequence I take into account both convenience and the construction practice of the real ship. For example, the shroud eyes were usually placed over the masthead first, and only then the stay eye. On a model, however, it is more convenient to set up a stay while the shrouds are not yet in the way. As a compromise, I first drop the shroud pairs over the masthead without tensioning them, then fit and tension the stays, and only after that proceed to tensioning the shrouds.
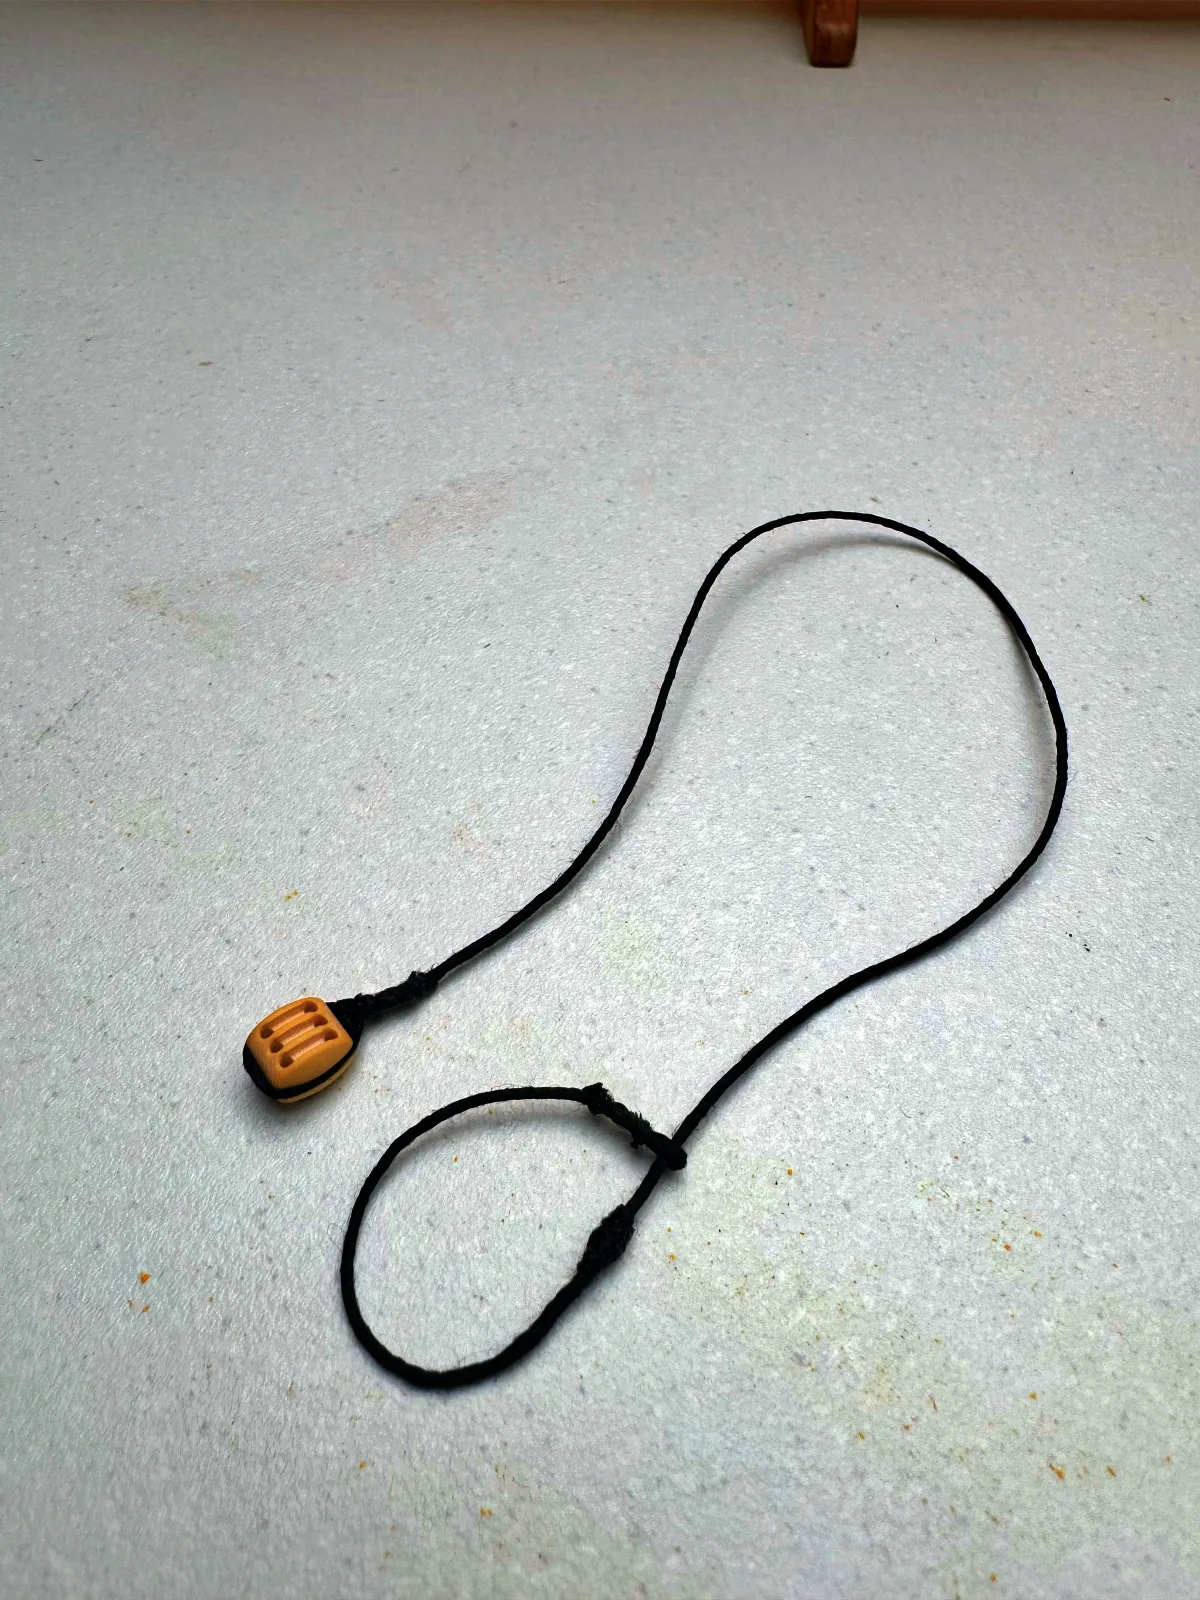
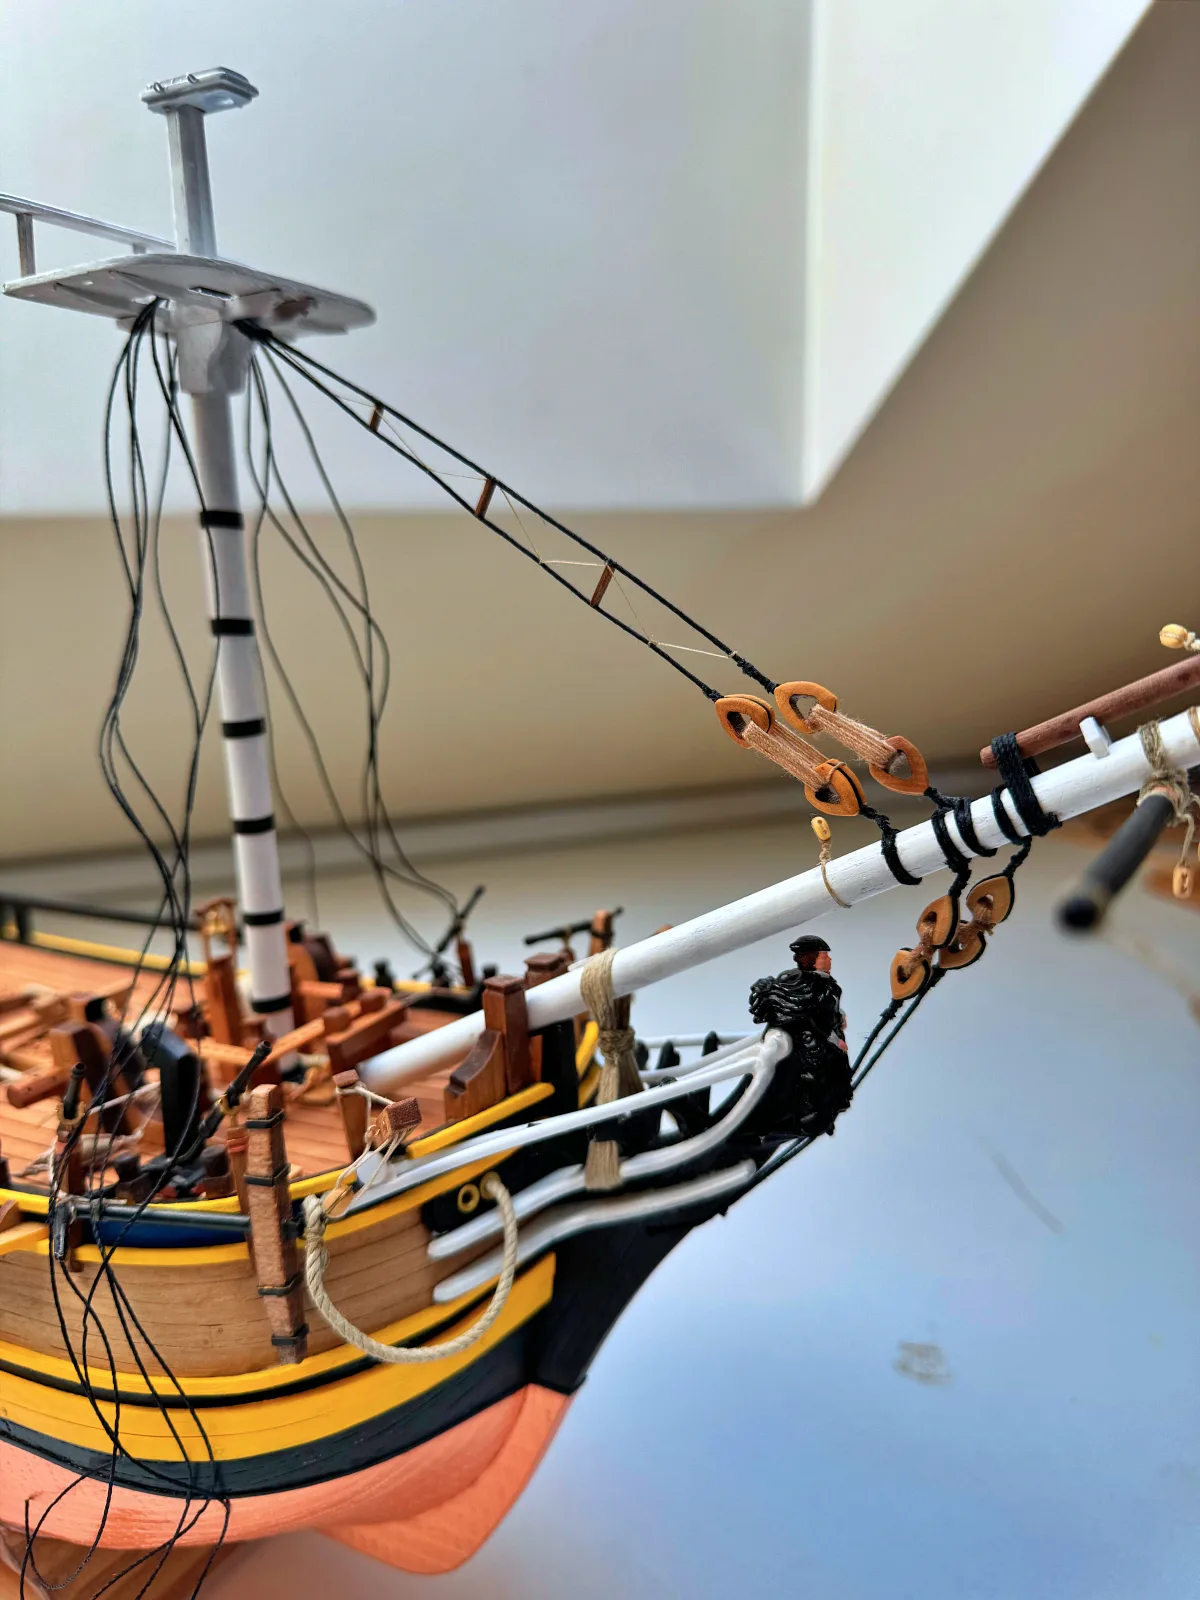
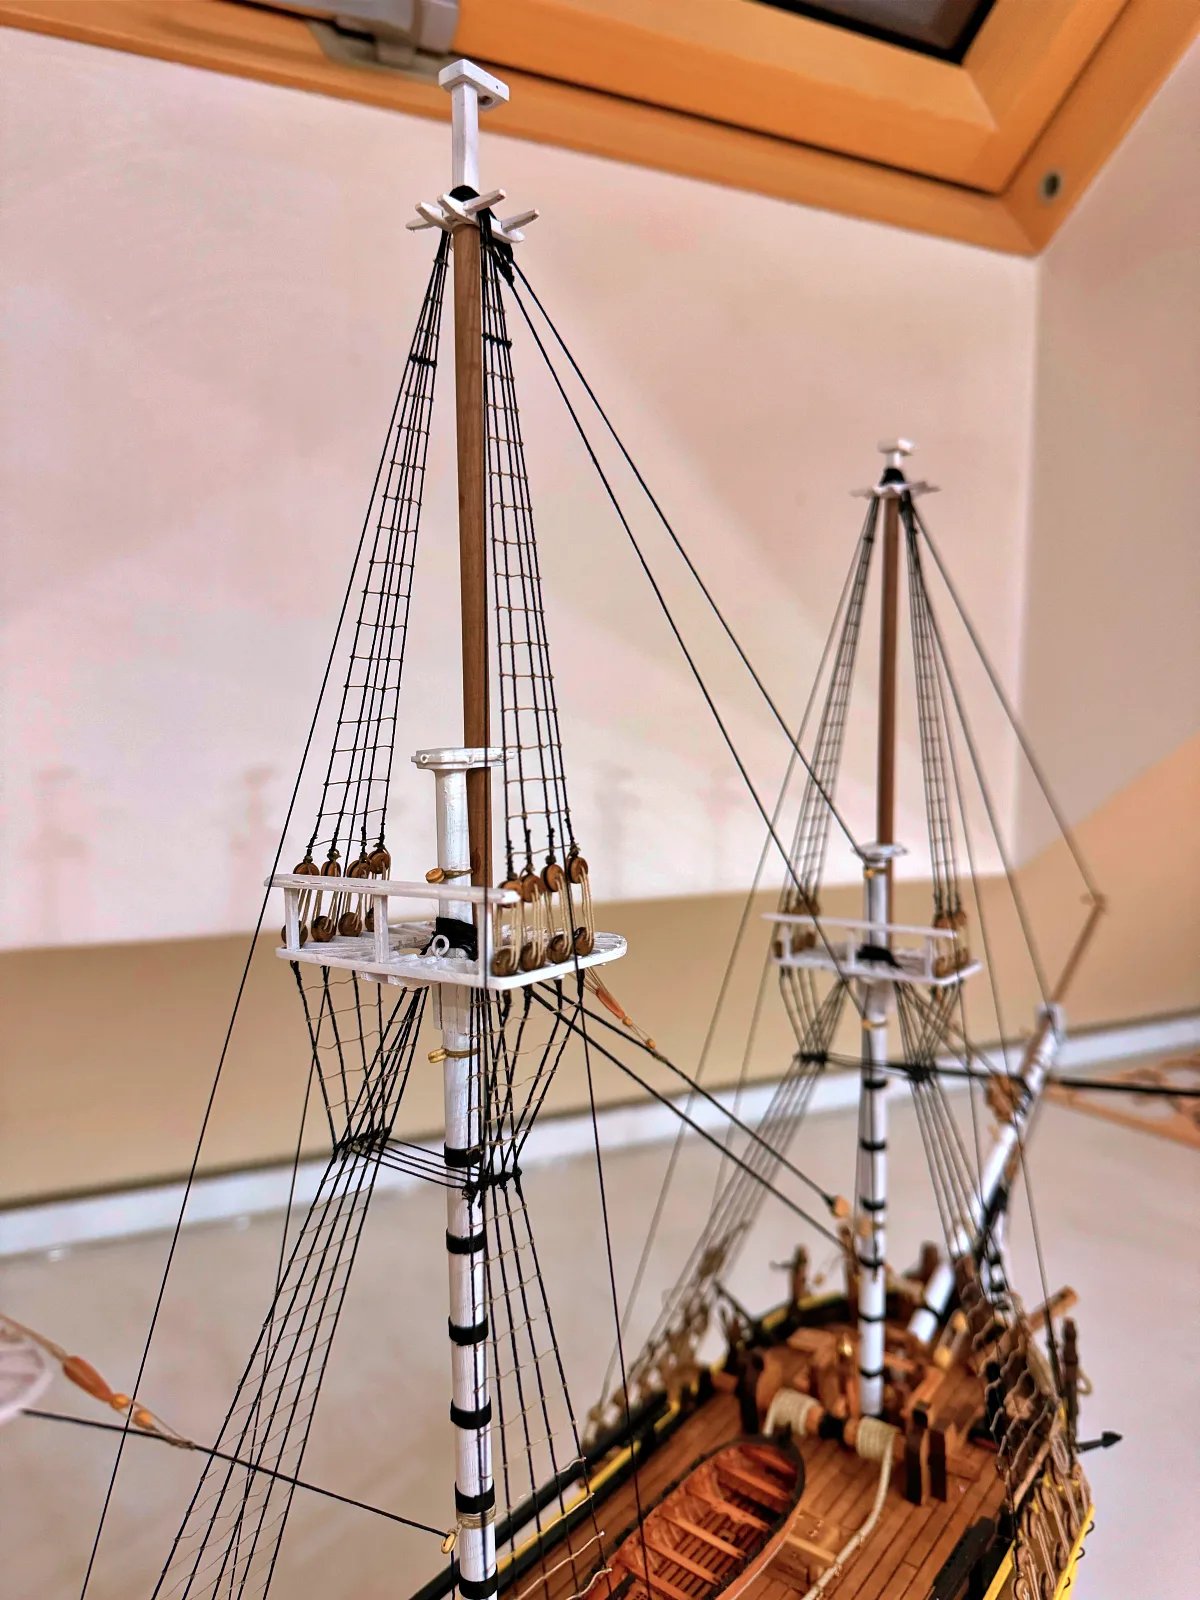
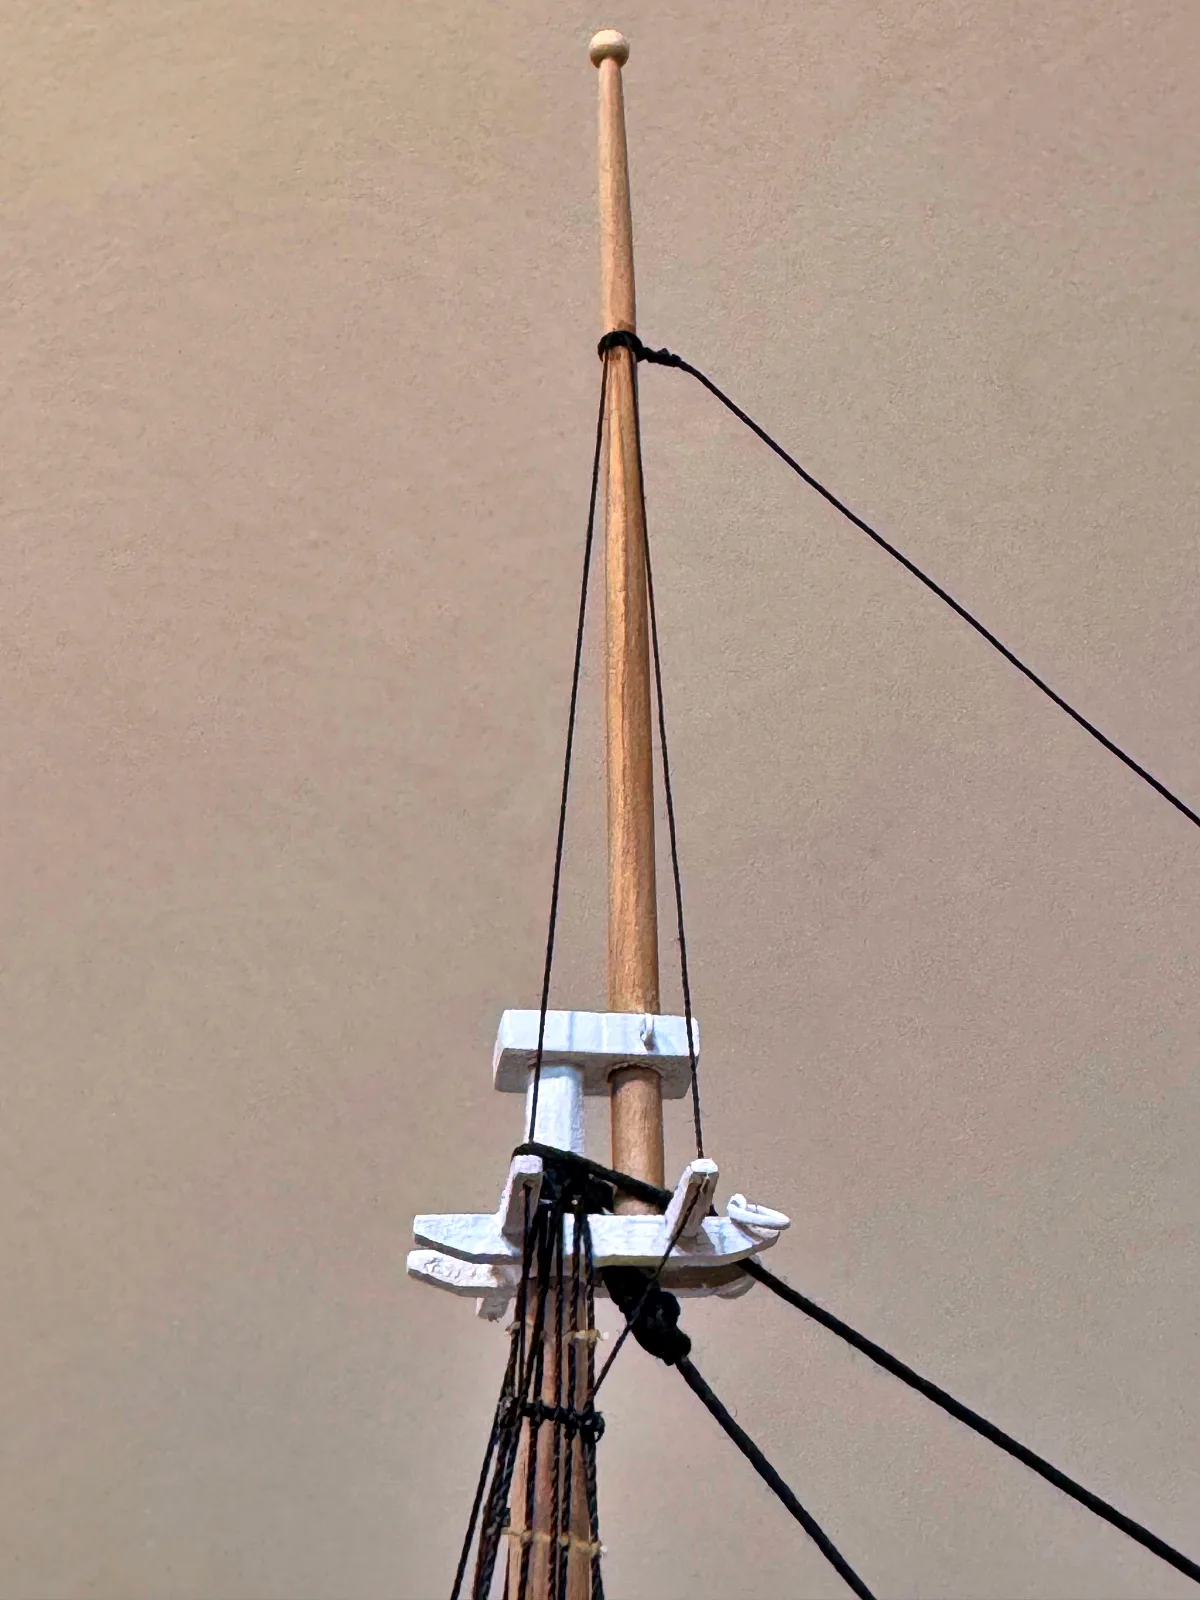
Stays. As a rule, stays are the heaviest ropes on the ship and are secured at the masthead with a mouse (a special seizing that prevents the eye from closing completely). Stays are set up (hove taut) via heavy blocks or thimbles. Therefore, the stay itself is first measured and made up, including the mouse and the block or thimble at the lower end; separately, a corresponding block or thimble is made and secured to the hull or another spar. When calculating the length of the stay, allow for the length of the tackle — it must correspond to the plan. The next step is to fix the eye over the masthead and, depending on the type of fitting, set up the stay using a thinner line as a lashing.
On larger ships, stays are often paired (stay and preventer stay / losseil-stay) — observe the sequence and fit the line that is secured lower on the mast first.
Shrouds. The number of shrouds varies greatly between vessels and masts, from three to a dozen or more. It is important to note that shrouds are generally paired. That is, a single rope is folded in half to form an eye (grommet) that is dropped over the masthead.
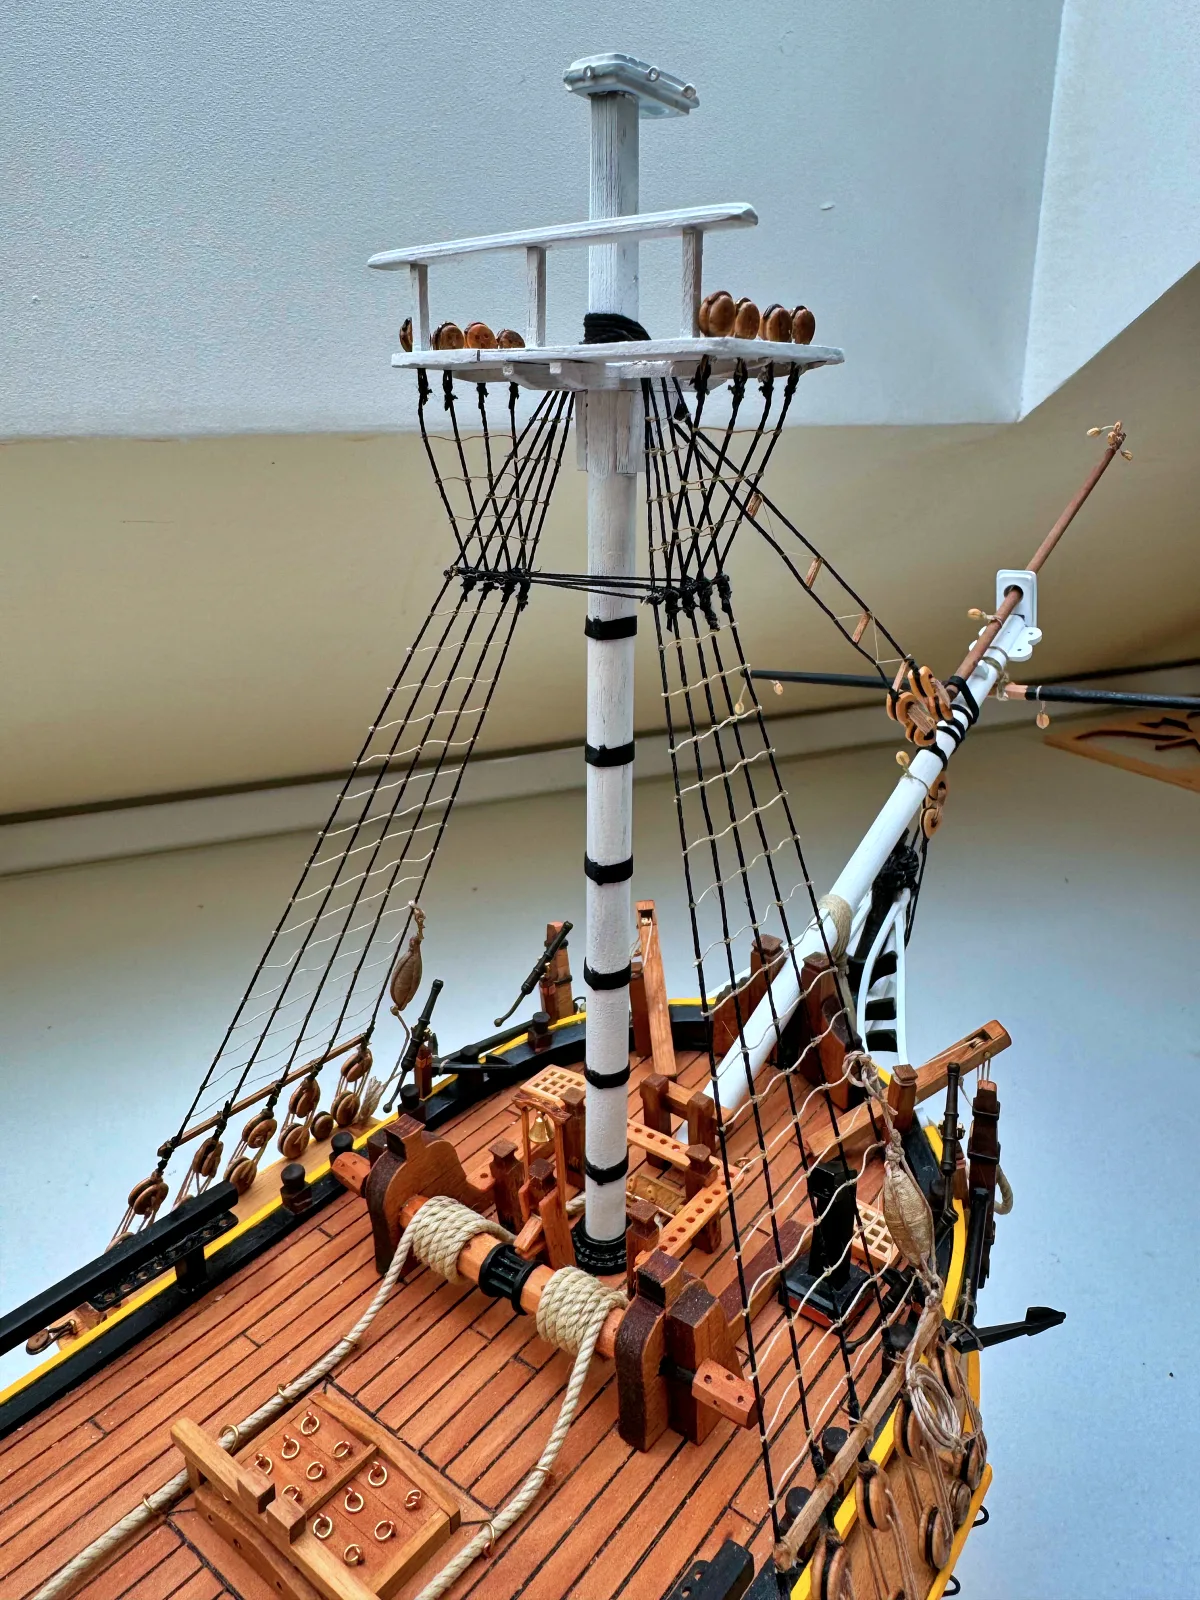
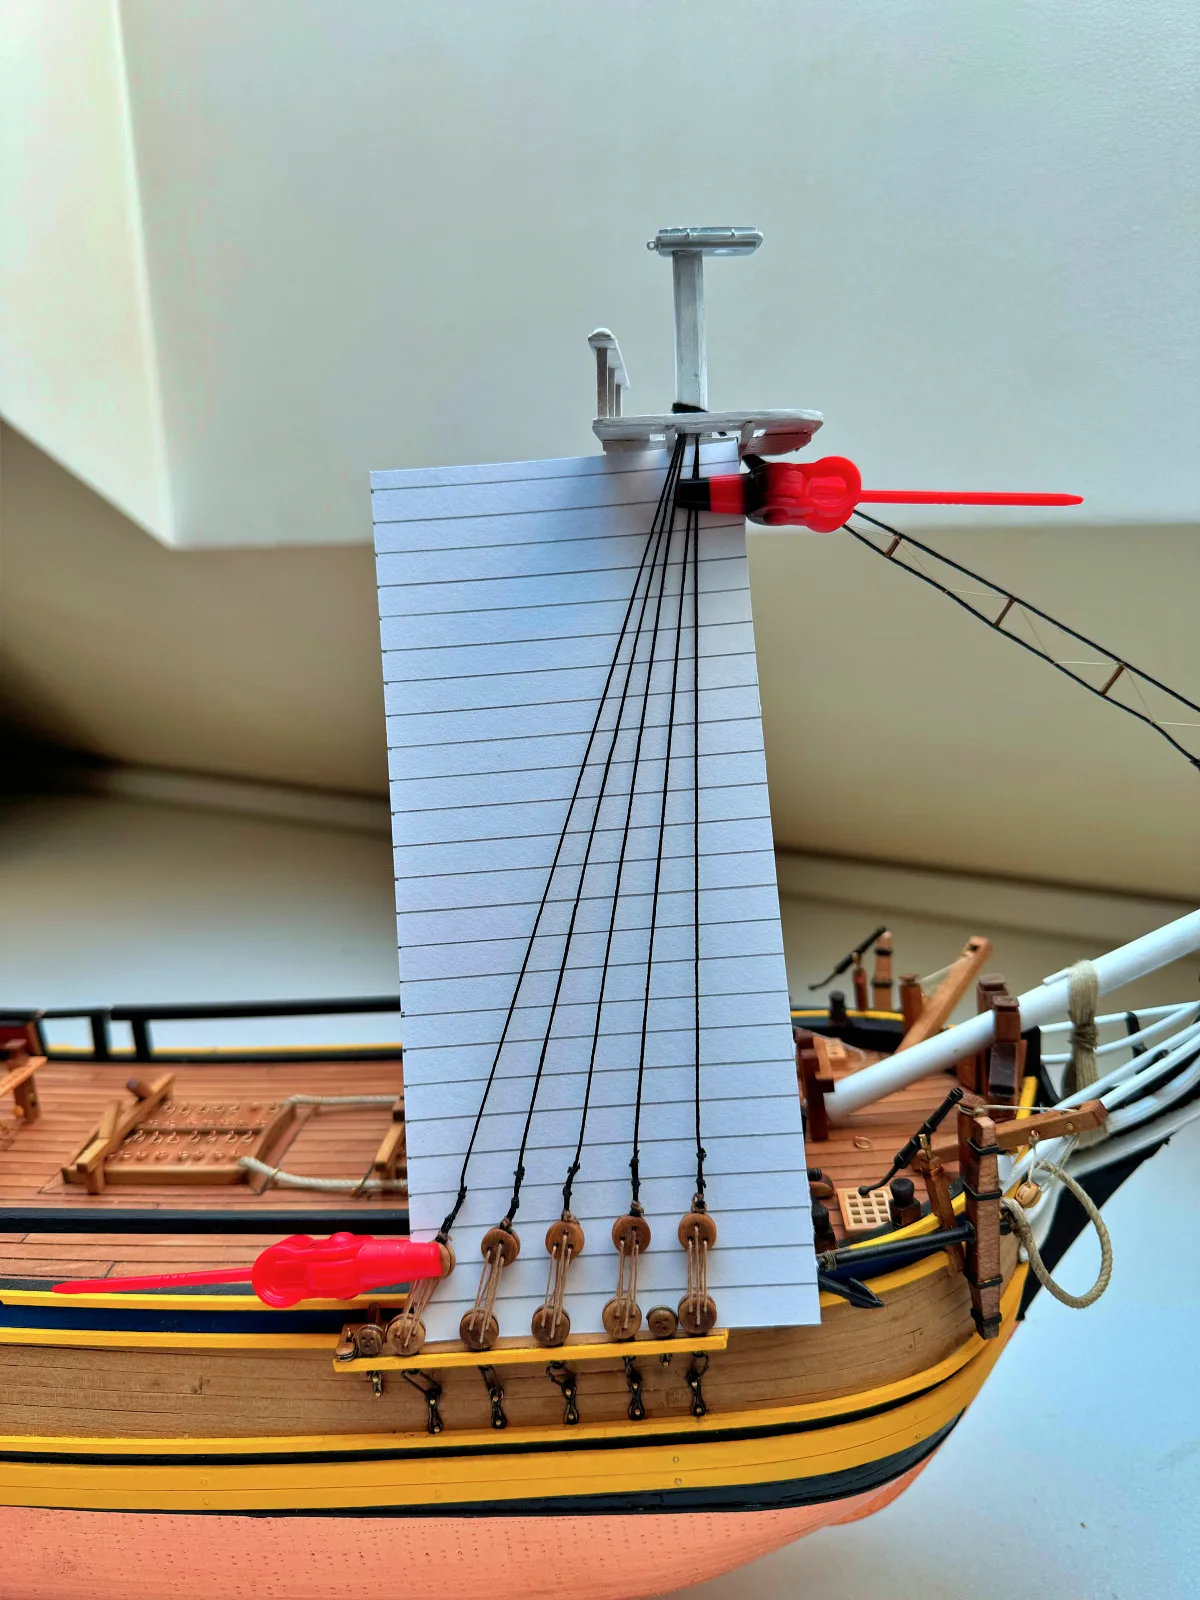
Such shrouds are fitted alternately — one pair to starboard, then one pair to port, and so on from fore to aft. When the number of shrouds is odd, the last single shroud is also fitted first to starboard and then to port. Shrouds are usually set up on deadeyes (depending on the model). At this point the channels and the lower deadeyes with their chain-plates must already be in place. Shrouds are tensioned in pairs; try to keep the distance between the upper and lower deadeyes consistent with the plan and equal on both sides. A useful jig consists of two small metal staples that can clamp the two deadeyes together while lashing. Sequence of operations:
- Fix the upper deadeye with the staples.
- Loop the free end of the shroud around the upper deadeye with the required tension and secure with a clamp.
- Secure the eye at the deadeye with several seizings of fine thread; additionally fix with a small drop of thin cyanoacrylate.
- Set up the shroud on the deadeyes using a thinner thread and secure the end to the lower shroud. Before lashing, make a knot in the end of the thread to lock the standing part in the hole of the deadeye.

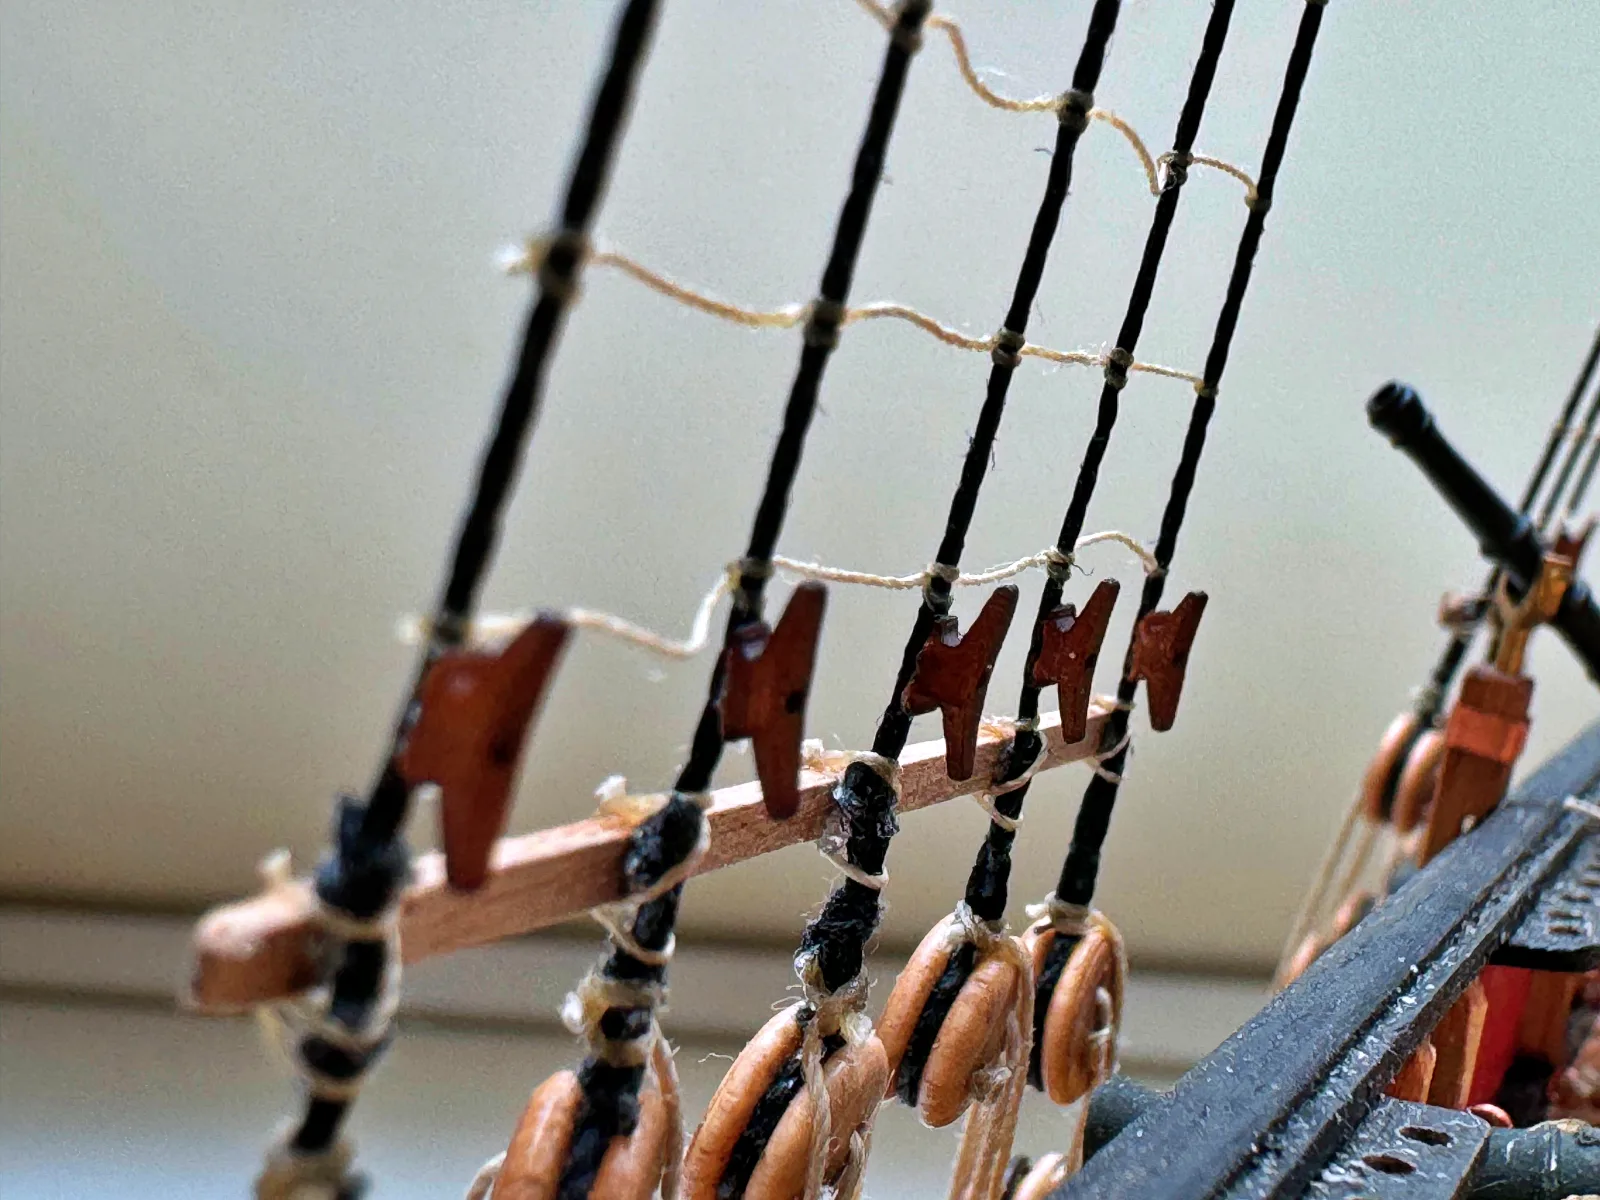
Once all shrouds are tensioned, most models require the fitting of ratlines — horizontal footropes made of thin line that allowed sailors to climb the mast, for example to handle sails. This is a separate major task: the ratline spacing is usually small and the number of knots tied runs into the thousands. A convenient aid is a pre-ruled template cut from stiff card, slipped behind the shrouds and used as a guide. A strip of wood of suitable width can also serve as a template. As a rule, each ratline passes across all shrouds parallel to the deck and is secured with a clove hitch.

I usually additionally fix each ratline in place with a tiny drop of thin adhesive.
Often, directly above the row of upper deadeyes, a batten is fitted to the shrouds — a special board serving as the first step. At the top a “wurst” (a length of tarred rope binding all the shrouds of the upper section parallel to the ratlines and serving, among other things, as an attachment point for the futtock shrouds) is fitted.
Special features of topmast shroud installation. In general, topmast shrouds are fitted in the same way as the lower shrouds, except that instead of chain-plates the lower deadeyes are held by futtock shrouds — short lengths of rope that embrace the deadeye above the top with one end and are secured to the lower shrouds in the region of the wurst with the other. Royal shrouds usually have no ratlines and pass through the spreaders of the topmast. They are set up via thimbles secured to the topmast deadeyes.
Fitting backstays and futtock shrouds. These standing rigging elements additionally brace the uppermost section of the mast (usually the royal mast), since the royal shrouds alone cannot provide the required stiffness. I usually fit them last, after the yards, sails and running rigging. They can be fitted earlier, but those long lines will then get in the way of other rigging work.