Hull Planking Basics
Use fairly thick (1–2 mm) and wide (5–7 mm) strips made from inexpensive, flexible wood. Linden is a common choice. The width speeds up the work, while the thickness gives you enough material for sanding. At the same time, always keep the scale and overall size of the model in mind: the smaller the model, the narrower and thinner the strips should be.
Try to use long strips wherever possible, as this makes it easier to maintain smooth lines.
In areas of strong curvature, for example near the stem, it is better to pre-bend the strips with steam or with a dedicated bending tool.
For fixing the strips in place, almost any wood glue will do. I use Titebond III: it gives a strong bond and sets quickly when heated, if you use a heat applicator. It is important to apply glue not only to the frames/bulkheads but also to the edge of the strip, because in some areas the strip may rest only against the neighboring strips (as on Santa Maria). If the bulkheads are thick enough, you can secure the strip with small nails, leaving them slightly proud so they can be removed after the glue has set. Small gaps are acceptable, but only small ones — up to 0.5 mm wide and no more than 20 mm long.
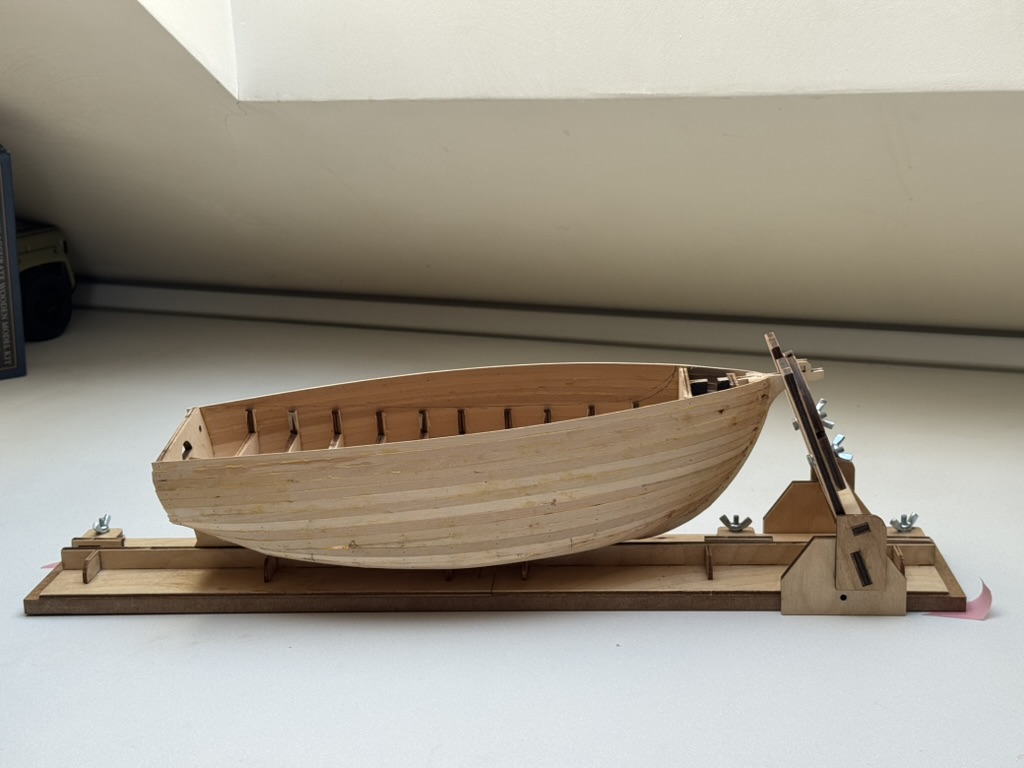
As a rule, strips in the bow and stern areas require additional shaping. It is best to cut each strip to fit. I recommend starting the planking from the bulwark downward to the bow knuckle, then working upward from the keel. This gives a better fit and helps avoid using plank belts of overly complex shape.
At the rough-planking stage, the main goal is to create a smooth base for the finish layer. That is why the strips may sometimes not follow the exact direction shown on the plans. This is not critical: the second layer will hide the rough planking and will also add strength to the hull because the strip direction differs between the two layers.
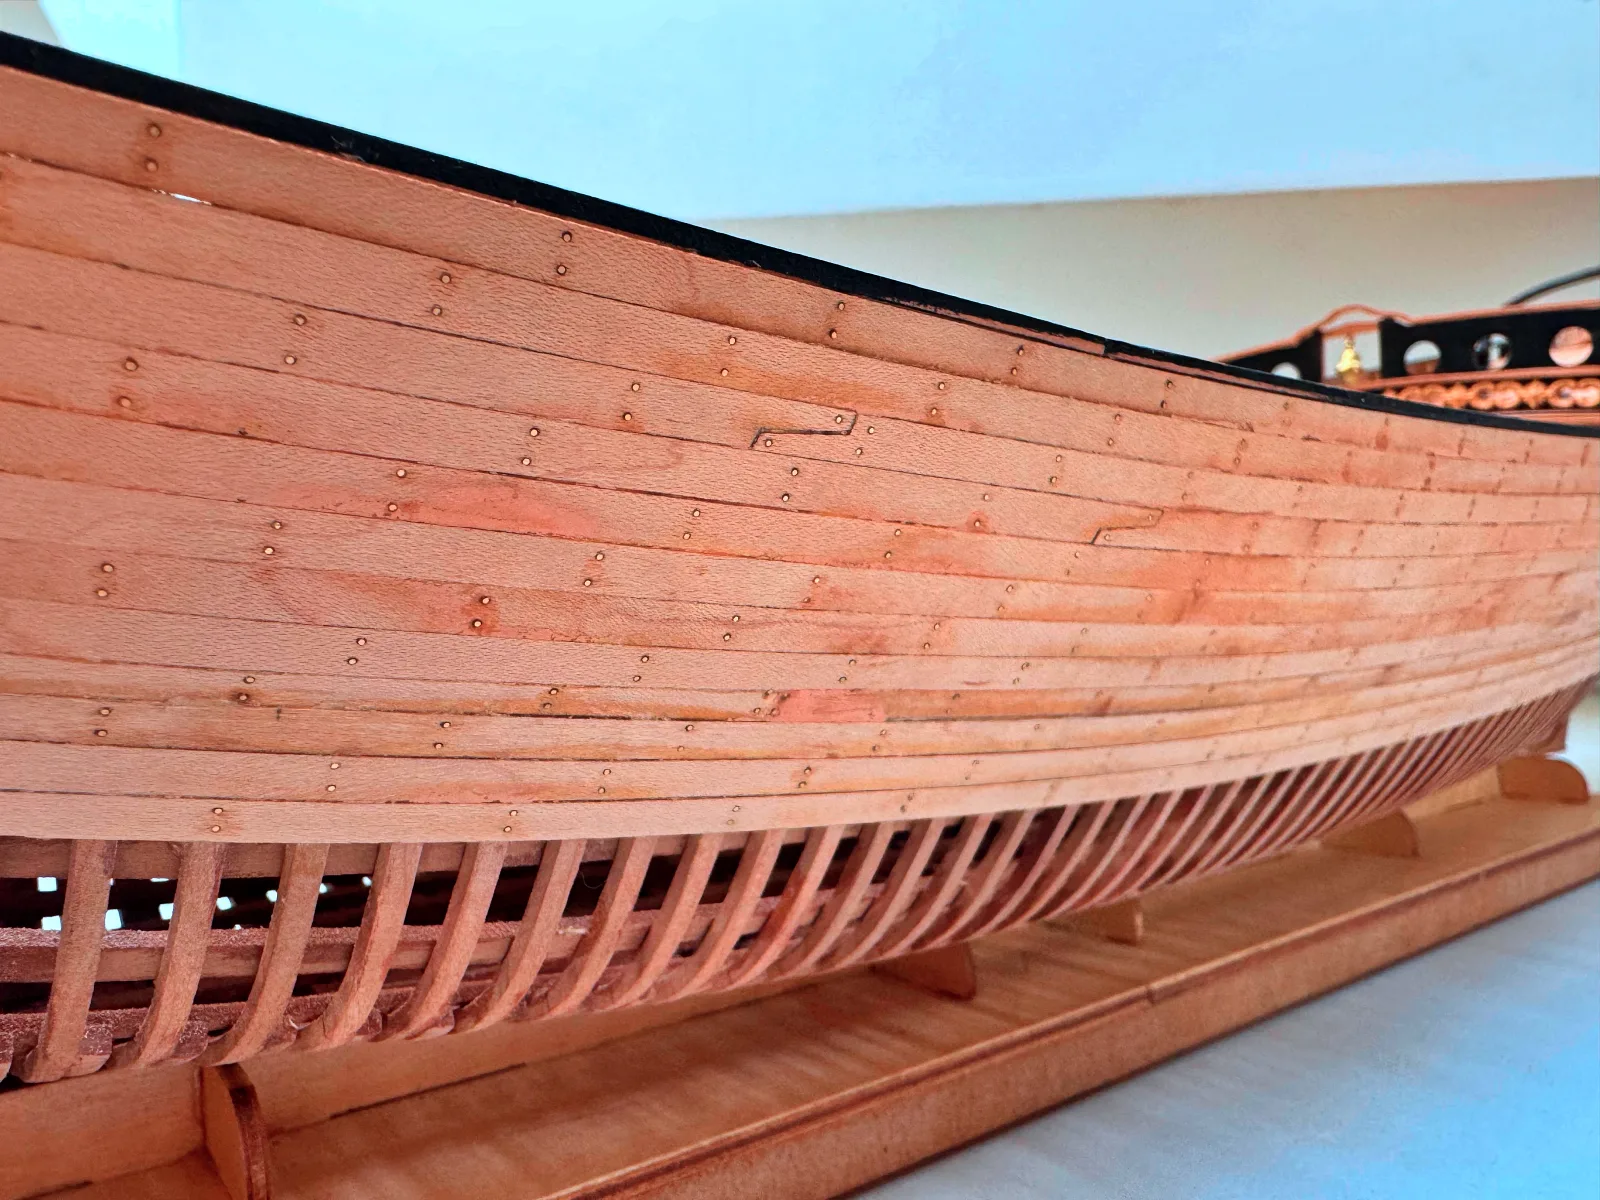
For the finish layer, I use short planks in keeping with the historical period and the scale of the model. Taking plank shift into account, I try to choose lengths divisible by three, so it is easier to stagger the butts and avoid aligned joints.
The strips of the finish planking are much thinner, and mistakes can no longer be corrected by sanding, so each strip must be fitted carefully. At this stage, I use transparent Titebond II so the seams look as neat as possible.
A short video shows the planking process using the Santa Maria 1:65 kit by Amati.
We will talk separately about fitting planks around the stem and sternpost area (see the section “Advanced Planking”) and about seam finishing and nailing (see the section “Planking — Finish Work”).